Face Editor
Contents
- 1 Face Editor overview
- 2 Viewing the face
- 3 Coordinate System
- 4 Drawing shapes
- 4.1 Selecting the drawing (object) type
- 4.2 Drawing circles
- 4.3 Drawing ellipses
- 4.4 Drawing rectangles and squares
- 4.5 Drawing custom paths
- 4.6 Drawing lines
- 4.7 Drawing arcs
- 4.8 Adding text
- 4.9 Adding images
- 4.10 Importing fonts
- 5 Using the Measure tool
- 6 Using the grid
- 7 Managing object properties
- 8 Adding cutouts
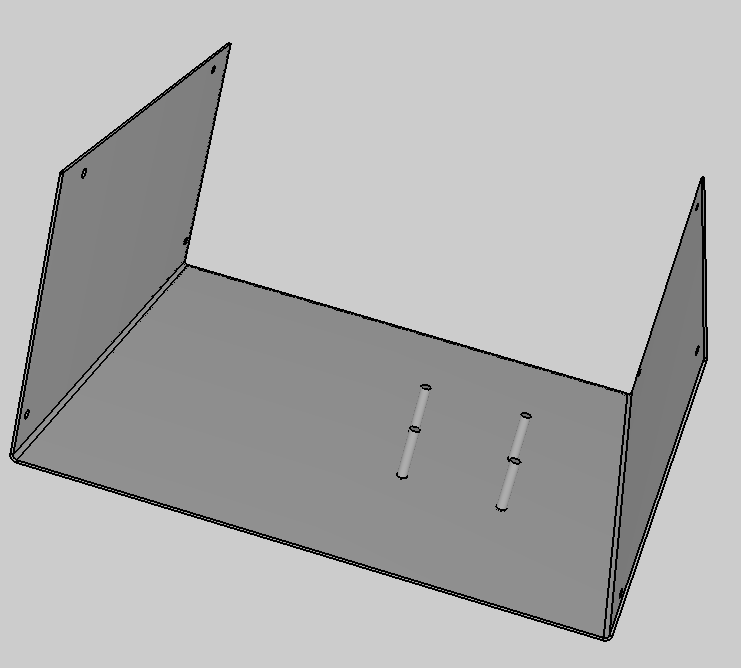
- 9 Adding hardware
- 10 Manipulating objects
- 10.1 Selecting object(s)
- 10.2 Editing object(s)
- 10.3 Moving object(s)
- 10.4 Locking item(s)
- 10.5 Grouping and ungrouping objects
- 10.6 Aligning and distributing objects
- 10.7 Cutting, copying, and pasting objects
- 10.8 Undoing and Redoing actions
- 10.9 Adding and managing layers
- 10.10 Using the Array Tool
- 11 Printing one or more faces on paper for review
- 12 Exporting and importing face templates
Face Editor overview
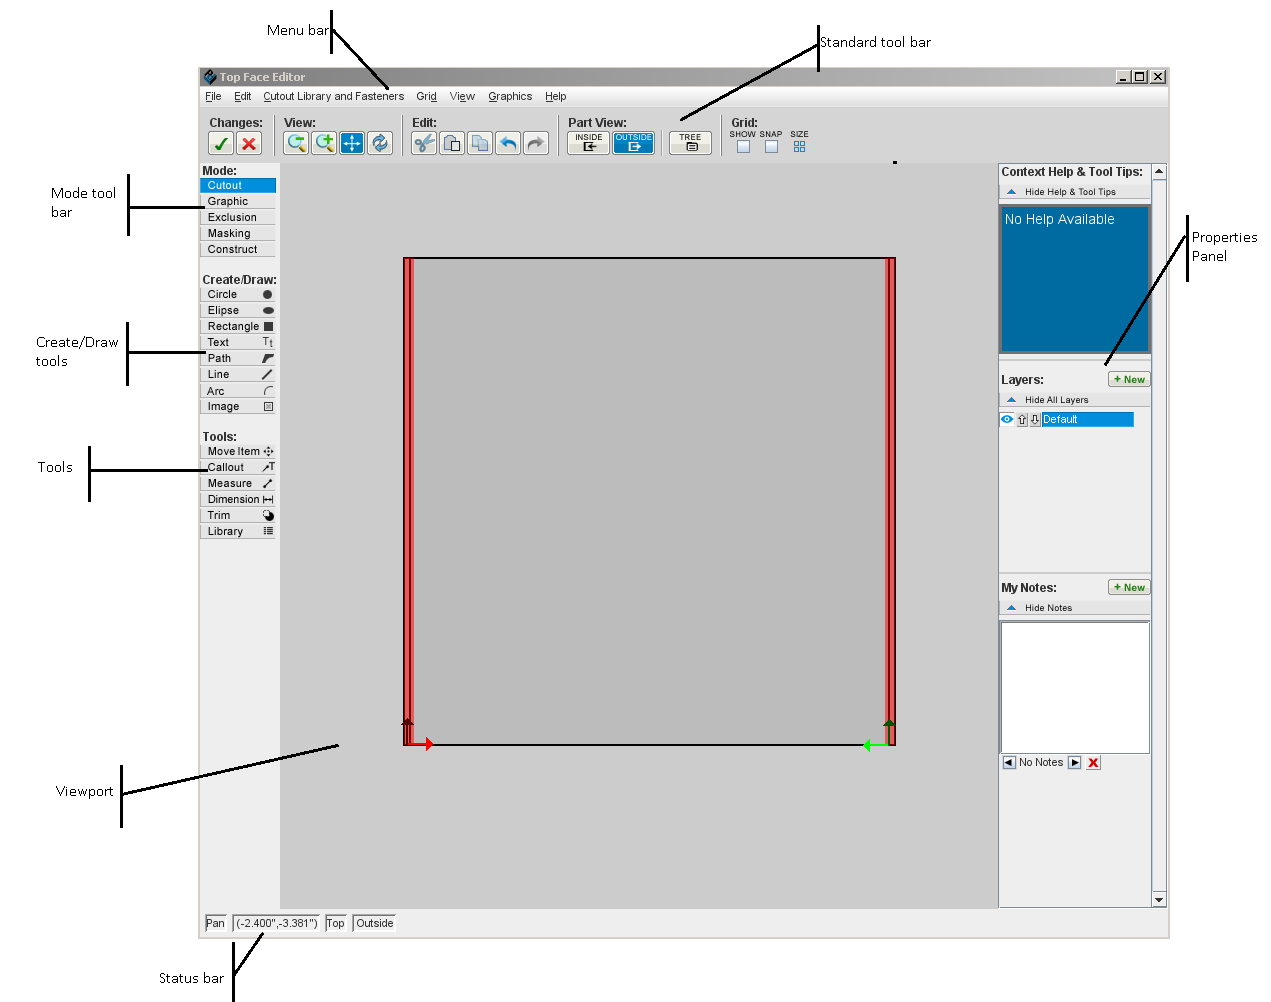
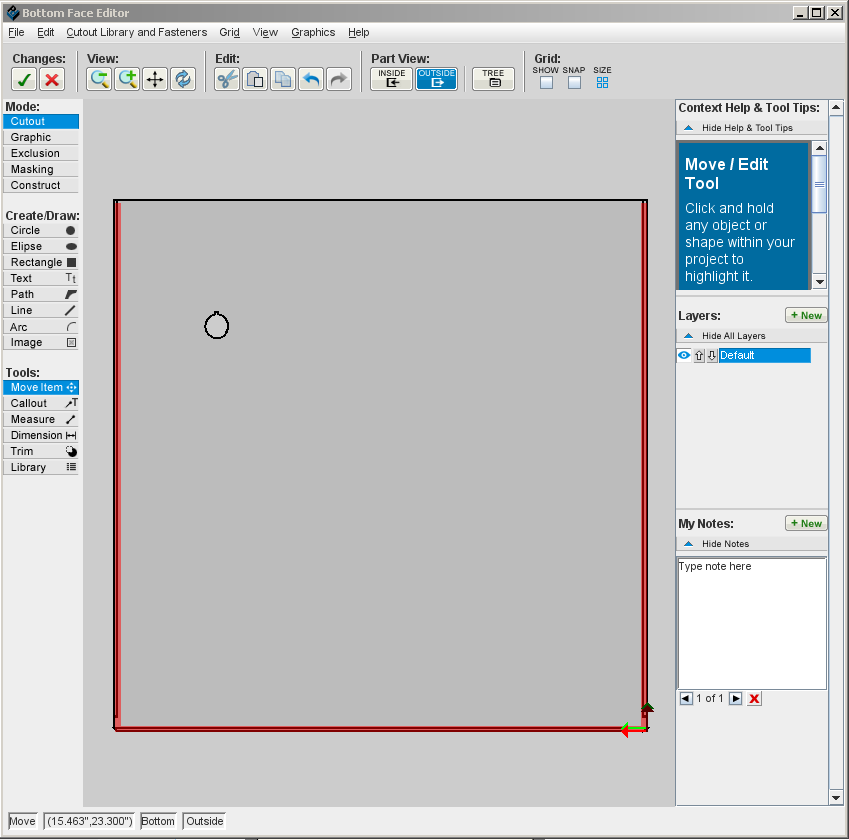
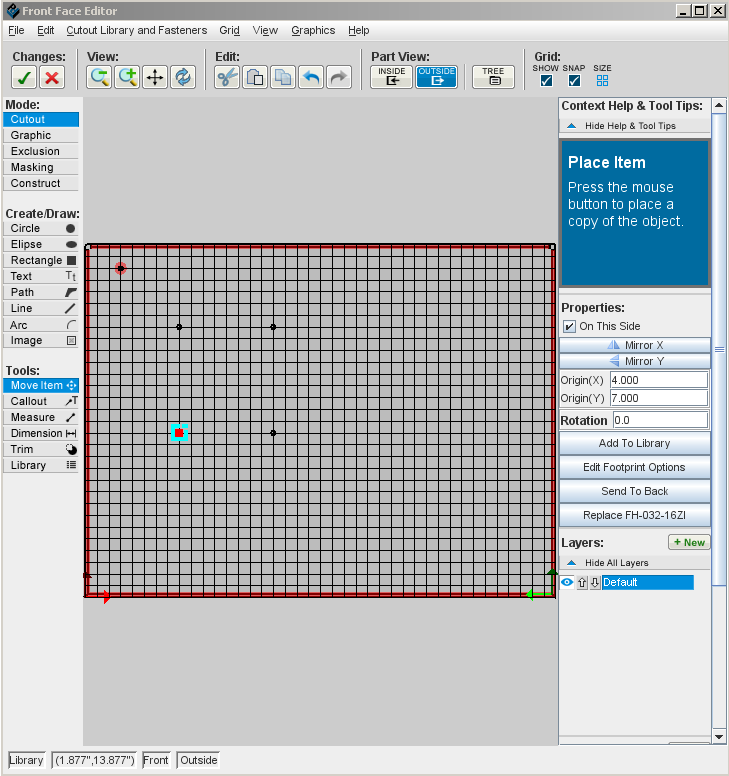
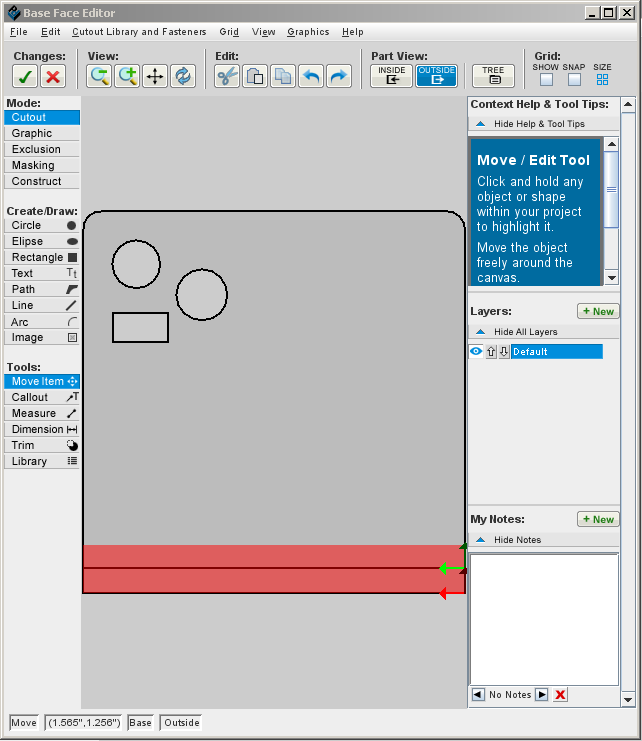
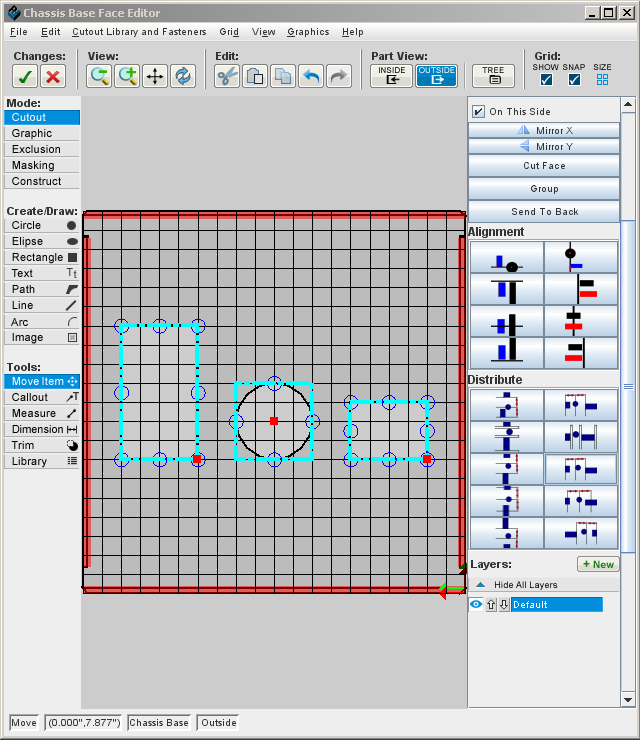
The Face Editor is the 2D workspace for designing each face of your enclosure.
- 2D Menu bar
- Contains File, Edit, Cutout Library and Fasteners, Grid, View, Graphics, and Help menus.
- 2D Standard toolbar
- Contains common commands such as Cut, Copy, Paste, Undo, Redo, and Zoom.
- 2D Mode toolbar
- Contains tools to add shapes, text, and images to the face, as well as exclusion and masking zones and construction lines.
- 2D Viewport
- Working area that shows a 2D view of your enclosure face.
- 2D Status bar
- Displays the currently selected view, X- and Y coordinates of the pointer, side of face showing (outside or inside), and the name of the face.
- 2D Properties panel
- Displays context-sensitive Help and properties that can be changed for the selected object.
2D Standard Toolbar
![]()
From left to right, the buttons are:
Face Editor preferences
If you want to use a different unit of measure or otherwise customize your Designer interface, you can set global parameters in the Preferences dialog box.
Viewing the face
Panning
To pan the model or face, do one of the following:
- or
- Hold down the <Alt> key, then drag the model.
- or
- Click and hold down the mouse wheel-button while dragging the face.
Zooming
When you zoom in/out in either the 3D View or the Face Editor, the face zooms in on or away from the pointer, so that you never lose your place.
- To zoom in/out in the 3D View, rotate the wheel button. Known Limitation: Using the mouse wheel button is currently the only way to zoom in the 3D view.
- To zoom in/out in the Face Editor, do one of the following.
- To zoom in on a particular area:
- Choose View > Zoom In or click the Zoom In button in the toolbar, then drag a box around the area you want to zoom.
Resetting the view
To return the face to its default location and zoom level, do one of the following:
Viewing the front or back of the face
When you click a face to edit, the side of the face that you click in the 3D View is displayed in the Face Editor. To toggle to the opposite side of the face, choose View > Toggle Side Showing.
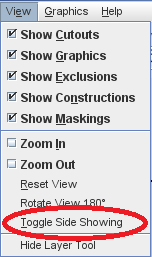
Or, you can use the 2D Standard toolbar buttons to display either side:
- To display the back of the face, click the Inside
 or Back
  button.
 - To display the front of the face, click the Outside
 or Front
  button.
(If an enclosure is displayed, the buttons are labeled Inside and Outside. If a panel is displayed, the buttons are labeled Back and Front.) Whichever button you click becomes shaded to indicate that it is in effect.
Coordinate System
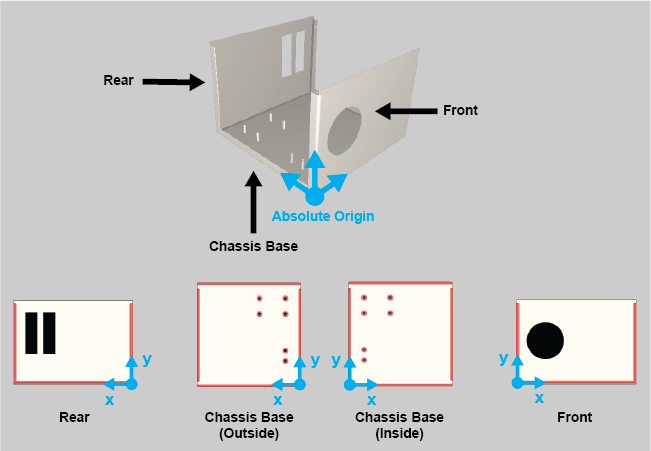
The origin in the Face Editor is located at the absolute origin in the coordinate system of the model. The x- and y-coordinates for each face are referenced from the absolute origin and always increase moving away from the origin. The figure below shows examples of the coordinate system for several faces on a U-Shape enclosure.
Choosing the Units of Measure
You can set the default unit of measure.
- Choose Preferences from the Edit menu.
- Click the down-arrow for Display Units.
- Select the unit of measure (INCHES, CM, or MM).
- Click OK.
Drawing shapes
Selecting the drawing (object) type
Select the type of object to be added to the face by using the Circle, Rectangle, and other buttons in the toolbar. The object types are Cutout, Graphic, Exclusion, Masking, and Construct.
- On the 2D Mode toolbar, click the button under the "Mode" label; by default, the object type is set to Cutout.
Using the Cutout object type
The Cutout object is used to add shapes for accommodating connectors, switches, ports, cutout logos and images, etcetera.
See Also:
Using the Graphic object type
The Graphic object type is used to add silkscreen or digital print to the face. Silkscreening is limited to specific colors; digital printing can print any number of colors, including gradients, with precise rendering. Note that you cannot apply both silkscreening and digital printing to the same face. Important! Before you select which method you will use, please see the constraints described in About Graphics.
Adding graphics (silkscreening or digital printing)
- Add text and/or images to the face. (The Mode automatically changes to Graphic.) The items will be silkscreened or digitally printed, depending on your Preferences setting.
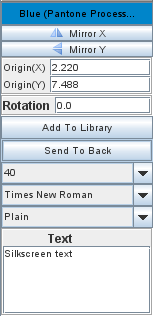
- When done, click the Edit tool or press <Enter>. The default parameters for the text are shown in the Properties panel, where you can change them (Color, Origin, Rotation, Point size, Typeface, and Style (Bold, Italic, etc.).
When using digital printing, please note the following limitations:
- You cannot use digital printing on metal if the color is "None"; it does not stick to bare metal so the enclosure must have a color.
- No part of the face being printed can be masked, because the reflection from the face will damage the print heads.
- You cannot use digital printing on aluminum or stainless steel with a grained finish.
- The printed area must be no more than 46"x46", and the face it is printed on can be no more than 24" high.
- The face and all its attachments must be entirely flat. Nothing (including PEMs and flanges) can stick up above the surface.
- The inside of the face cannot be printed.
Setting global silkscreening or digital printing preferences
- Choose Edit > Preferences.
- In Graphics Type choose one of the following from the menu:
- Silkscreen (Every face will use silkscreen.)
- Digital Printing (Every face will use digital printing.)
- Ask (The first time you either click the Text button or change the Mode to "Graphic" for a face, you are prompted to choose which method to use for that face.)
- Click OK.
Changing between digital printing and silkscreening
- In the Face Editor, select the face that you want to change.
- Choose the Convert... command from the Graphics menu.
- If the face is using silkscreen, the Convert to Direct Digital Printing command is listed in the menu. If the face is using digital print, the Convert to Silkscreen command is listed in the menu. When changing from digital print to silkscreen, colors are automatically adjusted to match stock Protocase silkscreen colors. Note that you can change the printing method for each face, but you cannot combine both methods on one face.
- If the face is using silkscreen, the Convert to Direct Digital Printing command is listed in the menu. If the face is using digital print, the Convert to Silkscreen command is listed in the menu. When changing from digital print to silkscreen, colors are automatically adjusted to match stock Protocase silkscreen colors. Note that you can change the printing method for each face, but you cannot combine both methods on one face.
See Also:
Using the Exclusion object type
The Exclusion object type is used to mark areas where other objects (except text and graphics) cannot be added. For example, if you add a cutout for a switch and want to ensure that nothing can be added to the design that would interfere with the switch body, you could add an exclusion zone over the cutout for the neck of the switch that covers the body of the switch. For specific applications of this technique, see the tutorials on Creating Double-D Cutouts and Creating Key Slot Cutouts. Note that exclusion zones allow text and/or graphics.
Using the Masking object type
The Masking object type is used to prevent an area from being painted. This is usually done to make a bare spot for an electrical ground. You can use Masking on any metal, although when you use it on cold rolled steel, you will receive a warning that the metal will rust.
- In the Mode menu, click the Masking button.
- Choose a shape (preferably a rectangle) and draw the area(s) you want masked.
Notes
- Due to manufacturing constraints, masking cannot be applied to any part of a face that has digital printing.
- If you mask the entire inside of a face that goes up against another face that has a bend, a tiny sliver of the bare metal will be visible on the outside of the case, around the bent edge. Generally this should not pose any problems, but if you want that sliver gone, make the masking rectangle smaller on that edge by about 0.1".
Using the Construct object type
The Construct (Construction) object is used to add a design or other reference (including a note) to any part of the design. Construct objects never affect production.
Drawing circles
- In the Mode toolbar, click the Circle tool.
- Click to place the centre of the circle, then drag to set the radius of the circle, and release the mouse button when it is the size you want.
- When done, click the Edit tool
 or press <Esc>.
Drawing ellipses
- On the Mode toolbar, click the Ellipse tool.
- Click to place the centre of the ellipse, then drag to set the radius of the ellipse, and release the mouse button when it is the size you want.
- When done, click the Edit tool
 or press <Esc>.
Drawing rectangles and squares
If you are drawing a square, first turn on the grid to restrict the bounding box to a square, or after you draw the rectangle, change the Width and Height fields in the Properties panel to be equal.
- On the Mode toolbar, click the Rectangle tool.
- Click to place one corner of the rectangle, then drag to set the opposite corner, and release the mouse button when it is the size you want.
- When done, click the Edit tool
 or press <Esc>.
Drawing custom paths
- On the Mode toolbar, click the Path tool
 .
. - Click on the face to place each point of the path.
- Click the first point again to finish the path and fill the shape.
Creating an arc using the Path tool
- On the Mode toolbar, click the Path tool.
- Click on the face to place the starting point of the arc (and, if you want to start the path with straight lines, additional points for each line segment).
- Click the arc button in the Properties panel, or press <a>.
- Click on the face to place the end of the arc.
- The arc is drawn, but is not yet locked. Note: The arc might not be displayed until you move the pointer.
- Drag the arc to change its size, then click to lock the arc size.
- The end point is the start of the next arc or line in the path. You can continue to place arcs, or change to lines (by clicking line on the Properties panel or by pressing <A>).
- If you are creating a cutout, close the path, either by ending a line or arc on the first point in the path, or by clicking Close Path in the Properties panel. Until the path is closed, it will not be displayed in the 3D View. (If you are creating a graphical object, it does not need to be closed, and will be displayed correctly in the 3D View.)
Path editing: Using the Trim and Merge tools to create cutouts
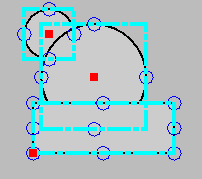
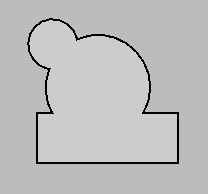
The Trim and Merge tools provide quick ways to create paths for cutouts. The Merge tool lets you create an outline (path) by merging multiple shapes. The Trim tool lets you delete lines in intersecting shapes to create the path you want.
To merge two or more objects
- Place two or more objects on a face, each overlapping at least part of one other object.
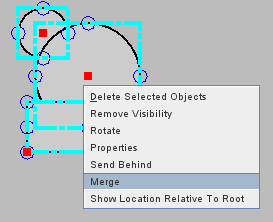
- Click the Edit button and select all the objects you want to merge. (If you select an object by accident, you can remove it by holding down the Shift key and clicking the object you accidentally selected.)
- Right-click within the selection and choose Merge from the popup menu.
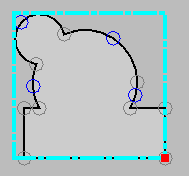
To edit a merged object
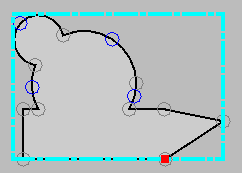
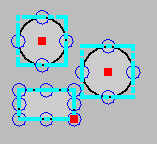
If you select a merged object, each node in what is now a single object can be dragged to further change the object shape. In this example, the selected node (colored red) is being dragged up and to the right.
Note If you save the merged items as a cutout, you might want to then change the saved cutout's origin to make it more useful for later placement, because Designer does not have control over where the origin ends up after merging objects.
To trim two or more objects
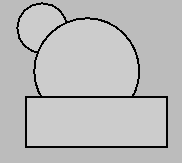
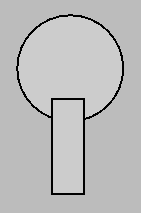
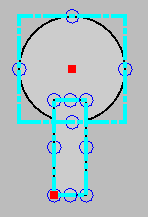
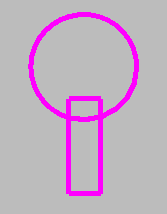
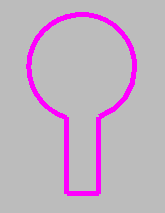
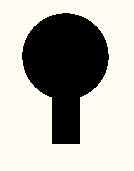
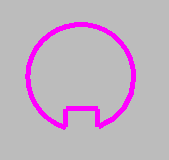
In this example, a key slot is created with the Trim tool.
- Place a circle on the face.
- Add a rectangle to the bottom of the face, overlapping it.
- Click the Edit button and select both objects.
- Click the Trim button.
- Use the eraser to eliminate the lines you do not want.
- When you are done, press the Esc key on your keyboard, or click any other button on the Mode toolbar, to exit the Trim mode. Important! If you click the Accept and Close button now, the trims will not be saved.
See Also:
Solving problems with merging objects
If objects being merged are very close to matching in size but are not perfectly matching, Designer can encounter redrawing issues that result in the cutouts disappearing and reappearing in the design. To fix such problems while retaining inexact matches, trim all the segments that are causing the problems, as described in this topic. (To ensure that objects match exactly, use the grid or specify positions as described in Creating custom vents.) Note that although both topics use vent slots as an example, the same general procedures apply to any merged cutout.
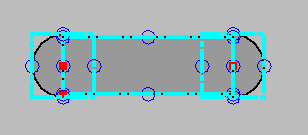
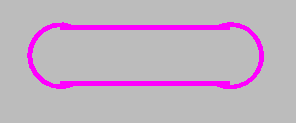
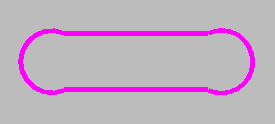
In this example, a vent slot was made by joining two circles and a rectangle. After the rectangle was drawn, the circles were added visually to each end of the rectangle, nearly perfectly the same size as the rectangle but extending just slightly beyond its top and bottom:
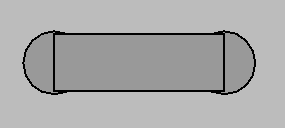
If you then merge them and click <Esc>, because the circle diameters are not exactly the same as the rectangle height, the image completely disappears from the 3D View, but the objects are still in the Face Editor view.
If you experience this problem but would like the slot to remain as designed, follow these steps to fix it. If you would like the slot to be the same size all the way across, delete the problem slot and draw a new one using either method given in the Creating custom vents topic.
- Click the Edit tool and select the two circles and the rectangle.
- Use the Trim tool to remove all the intersections of the circles with the rectangles that you do not want. Zoom in enough to see the tiny segments remaining, and remove them as well.
- When completed, click the <Esc> key or the Accept and Close button, and the objects are merged correctly.
Drawing lines
- On the Mode toolbar, click the Line tool.
- Click and hold down the mouse button to start the line.
- Drag to set the end of the line.
- When you are finished drawing lines, click the Edit tool
 or press <Esc>.
Drawing arcs
- On the Mode toolbar, click the Arc tool.
- Click and hold down the mouse button to start the line that will describe the arc.
- Drag the line, and release the mouse button at the end of the arc.
- Move the mouse to a point on the arc and drag to resize it; when it is the size you wish, click the mouse to complete the arc.
- When you are finished drawing arcs, click the Edit tool
 or press <Esc>.
Adding text
- On the Mode toolbar, click the Text button.
- Click on the face and begin typing.
- Note: After placing one piece of text, even if you press the <Enter> key, you are still in text mode; if you click elsewere on the face anywhere and type, you will enter more text at that new location. This allows you to enter multiple text blocks at a time.
- When you are finished adding text blocks, click the Edit tool
 or press <Esc>.
 - Using the Properties panel, you can now change the Rotation, Font, Font Size, and Font Style. You can also edit the Text. For details, see Managing object properties.
Adding special characters
If working with the Windows version of Designer, special characters can be added using the key combination of ALT + the decimal ASCII code, as outlined in the linked Unicode table. The values from the Latin and Latin 1 sections have been tested to work properly.
There is similar functionality in Linux and Mac environments, but the implementation of them is system specific. As an alternative, you can follow the procedure below.
If the symbol you are looking for cannot be found in that table, you can try adding any special character you require as follows.
- Copy the character.
- In Designer, paste the character into the text field in the Properties panel:
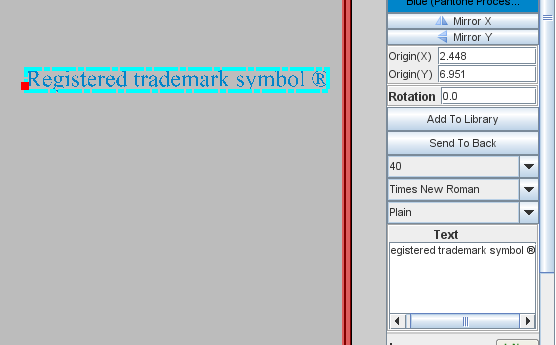
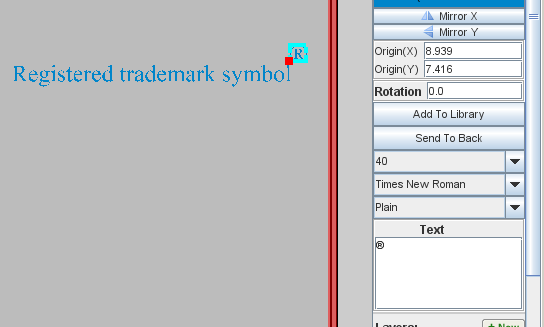
- Tip The method above places the symbol on the same baseline and in the same size as the text. Since the trademark symbol and the registered trademark symbol are typically in superscript, you can create this effect by adding the symbol to a text field of its own, making it a smaller font size, and placing it slightly higher than the text:
See Also
Adding images
You can add images (graphics files) to a face, in bitmap format (.BMP, .PNG, .GIF, .JPG, or .PDF), as well as Scalable vector graphics (.SVG). Other vector files (.AI, .EPS, .DXF, .DWG, or .PDF) can also be included for production purposes, though those formats are not displayed.
Note: A .PDF can be in either bitmap or vector format. For details and help in determining which yours is, see Spotting the Difference.
If you have one or more complex images that wrap around cutouts and/or occupy a large portion of a face, you may want to use the Export/Import Face Template feature instead. For details, see Exporting and Importing Face Templates.
- Click the Image button
 on the Mode toolbar.
 - Click on the face where you want to place the image. The Choose Bitmap dialog is displayed.
- Navigate to and select the bitmap file, then click Open. (Note: The file name might not be listed in the Open dialog, even though it is in the folder. In this case, enter the file name manually.)
- Designer does not yet display vector graphics; this functionality will be added to a future release. However, vector graphics produce much better results when the image has hard lines and curves, such as in a logo or any text, so after you add the bitmap graphic for display, Designer gives you the following options:
- Add a vector image: Click this button to navigate to and select the vector file version of the bitmap image that you loaded, in one of the supported vector file formats (.SVG, .AI, .EPS, .DXF, .DWG, or .PDF).
- Have us fix the image: Click this button if you do not have a vector file version and would like Protocase to create it for you. You will be informed of the added fee. Note that graphics with subtle gradients or fine detail might be impossible to recreate; if this is the case, you will be informed after the file is received.
- Leave it alone: Click this button to if you do not have a vector file version but do not want Protocase to create one for you, knowing that pixelation might occur in any hard lines or curves.
- After selecting one of these options, the image is added to the face.
Notes:
- It is recommended to set silkscreen quality (Edit->Preferences->Display Settings) to at least 70% to display images clearly.
- Do not attempt to save a flat image as one of the supported vector types for importing into Designer.
- Extra charges will be incurred if the graphic is on any powder coating other than white, since an underbase must be applied for the graphic to be visible and the proper color, and a silhouette of the image must be created for that underbase. You will be informed of the extra charges before production begins.
- If using Inkscape to work with your SVG file, be aware that FlowText (and FlowRoot), used by Inkscape in certain circumstances, is not part of the SVG standard and may cause issues when importing. This can be corrected by selecting the text then going to menu Text->Unflow or hitting (Shift-Alt-W). Then delete the "ghost" image that appears outside the draw box and save the file as "Plain SVG". This should allow the SVG image to import.
Exporting images
You can export an image from a face. The graphic is exported to a .PNG file.
- In the Face Editor, click the Edit button on the Mode toolbar, then click the image you want to export.
- Click the Save Image To File button in the Properties panel. The Save dialog opens.
- Choose the folder, enter the file name, and click Save.
Importing fonts
You can import your own fonts to be used on a face.
- Click the Graphics menu in the face editor.
- Select Import font.
- Select the font you would like to import, and click open.
Notes:
- Some fonts do not silkscreen well, and if used with silkscreening we will review your design manually before approving it.
- Typically, 13pt fonts and above will not generate problems. If you are using a font with no slim lines or features, sometimes you may go as low as 9pts.
- If the paint used on your enclosure is Sandtex or other rough paint, an additional 2pts size is recommended.
Using the Measure tool
The Measure tool lets you measure between two points on a face, and move and/or align one object precisely in relation to another one.
See Also:
Using the Measure tool to determine the distance between two points on objects or anywhere on a face
- On the Mode toolbar, click the Measure button.

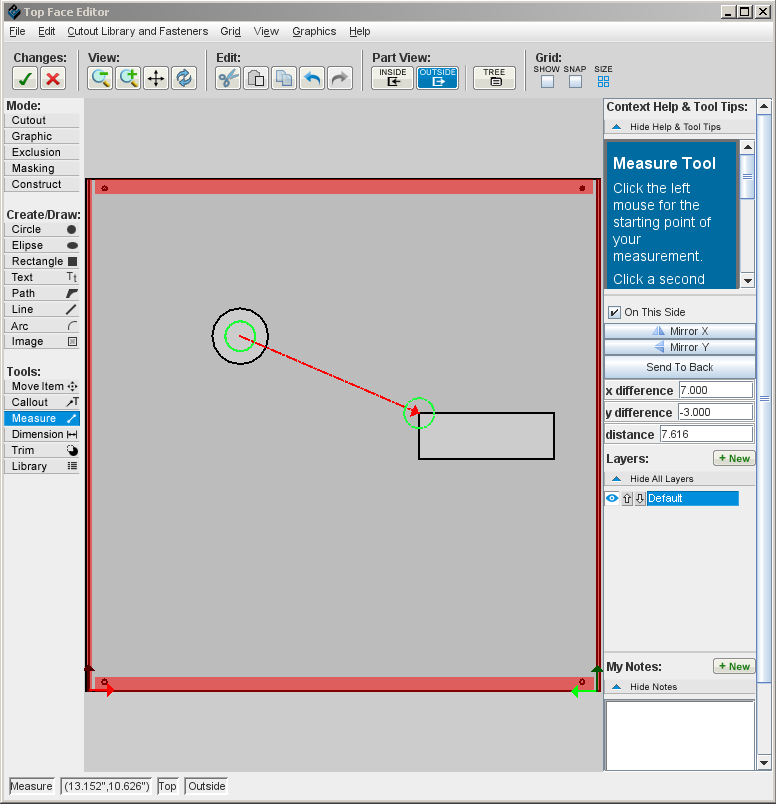
- On the face, click the start point (the object or location that is to be the reference point), then click the end point (the object or location that is to be placed in reference to the starting point).
- You can continue measuring distances in the same way. When done, click the Edit tool
 or press <Esc>.
Using the Measure tool to move an object a specific distance from another object
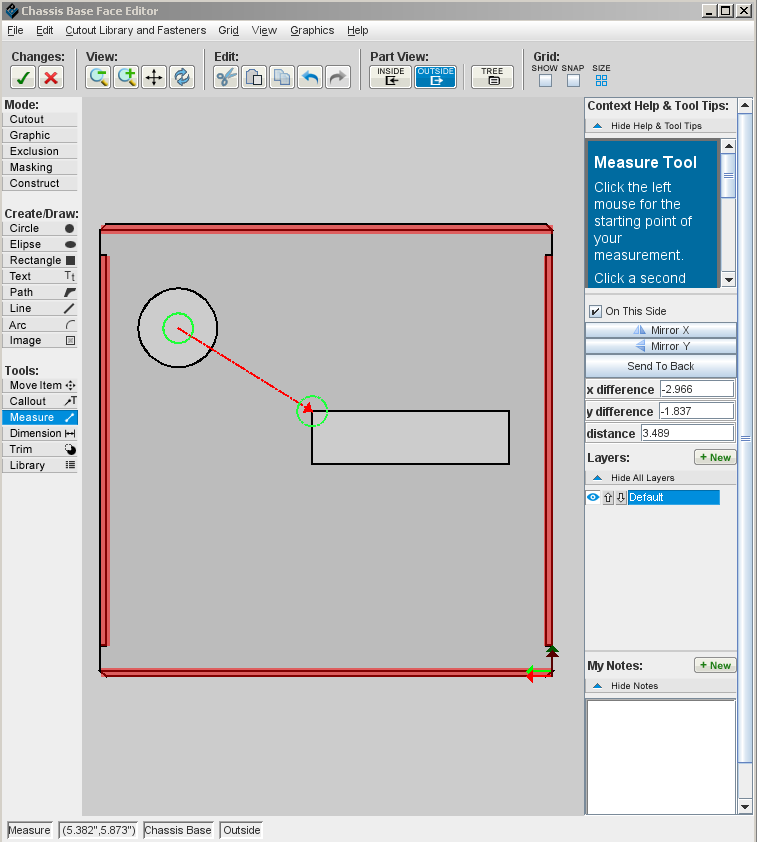
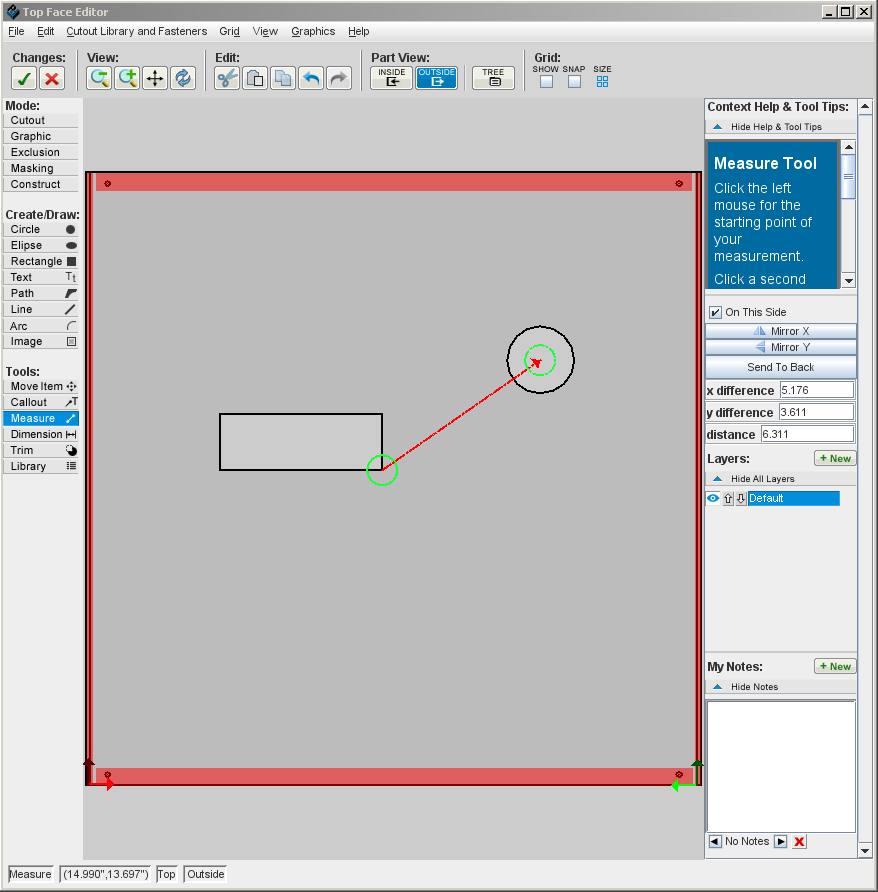
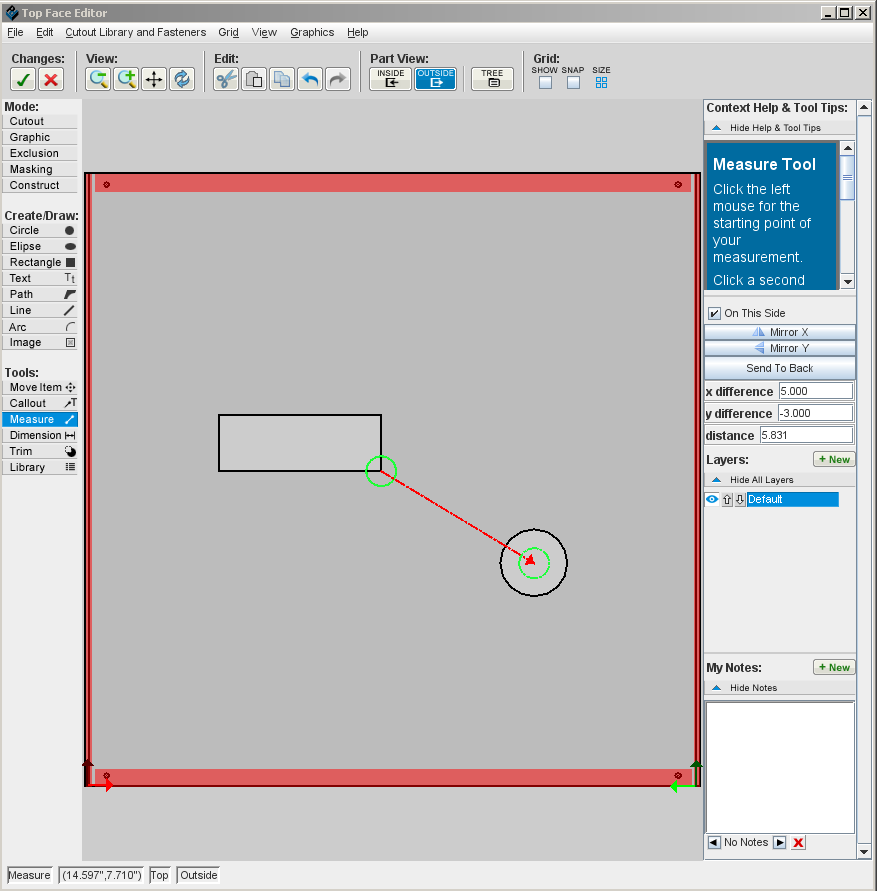
You can use the Measure tool to move an object a specific distance from another object. This example shows how to move the centre of a circle cutout 5 inches to the right and 3 inches below the bottom right corner of a rectangle cutout.
- On the Mode toolbar, click the Measure button.

- Click the bottom right corner of the rectangle cutout.
- Click the centre of the circle cutout.
- Enter "5" in x difference and "-3" in y difference.
Using the Measure tool to specify both distance and alignment between objects
You can use the Measure tool to specify both distance and alignment between objects. Once you determine the absolute coordinate for one object, the Measure tool lets you place all other objects on the face relative to that object.
- On the Mode toolbar, click the Measure button.

- On the face, click the start point (the point that is to be the reference point), then click the end point (the point of an object that is to be placed in reference to the starting point).
- Edit the x difference and/or y difference to position the second point in relation to the first. For example, to position an object one inch away from an existing object along both the X and Y axes, enter a y difference of "1" and an x difference of "1".
- Note: If you do not need to measure or specify a distance between two objects, you can align them using the Alignment tools in the Properties panel.
- Note: If you do not need to measure or specify a distance between two objects, you can align them using the Alignment tools in the Properties panel.
Displaying measurements
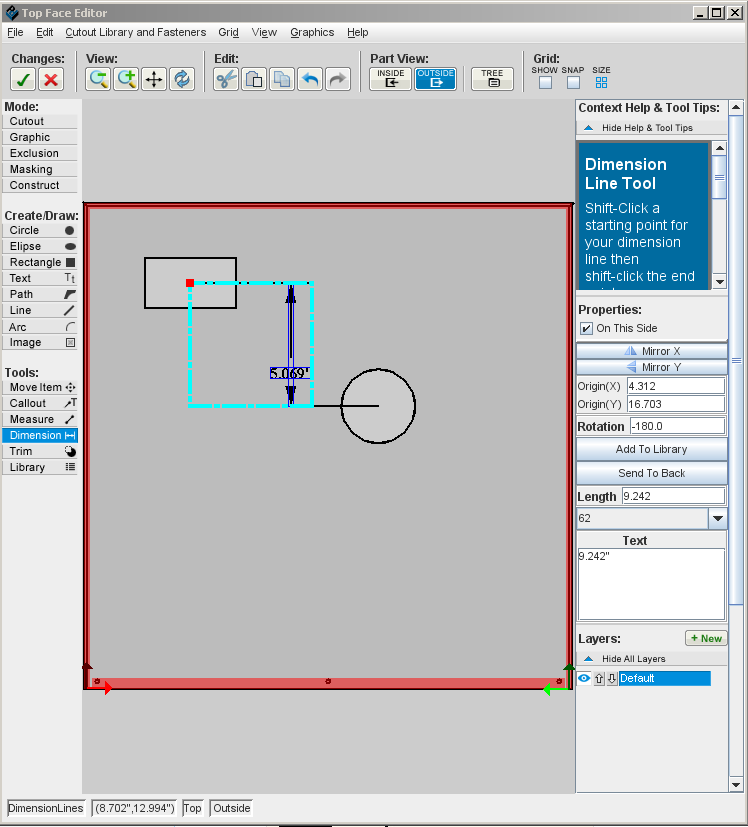
The Dimension tool lets you display the distance between any two points on a face. You can then take a screenshot with the measurements displayed, for peer reviews or other purposes.
To measure and display the distance between two points
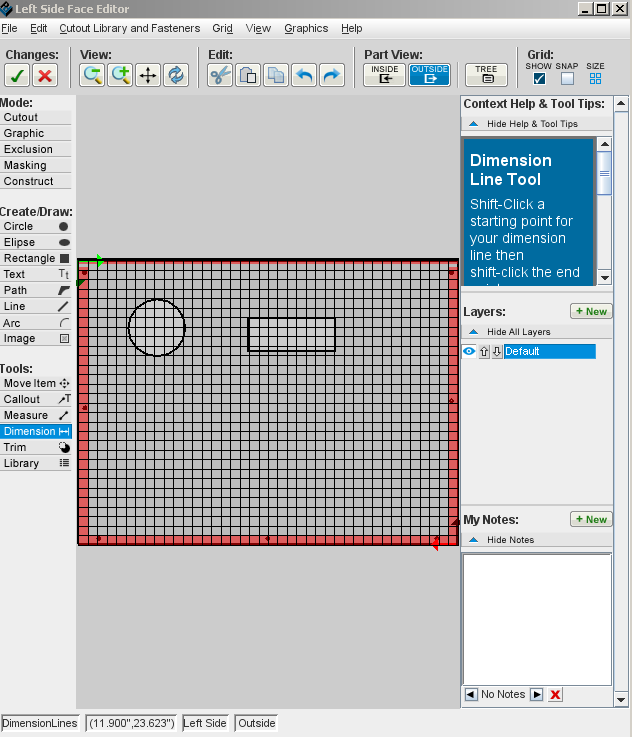
- On the Mode toolbar, click the Dimension button.

- The distance of "0.000" is displayed at the cursor position, which is the current endpoint.
- Click the first endpoint of the distance you wish to measure, then move the cursor.
- As you begin to move the cursor, the distance between the endpoint and the cursor position is displayed.
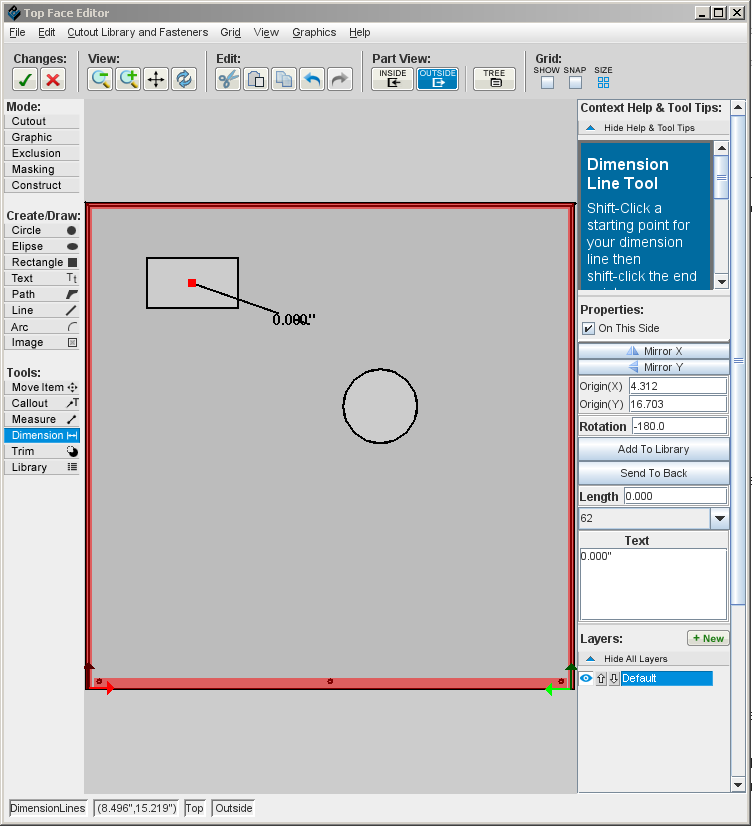
- If you make an error, click the Undo button in the Face Editor toolbar.
- When the cursor is near an object, it snaps to the important points of the object (its center, or one of the compass points on its outline), a green circle is drawn around the snap-to point, and the lines turn green.
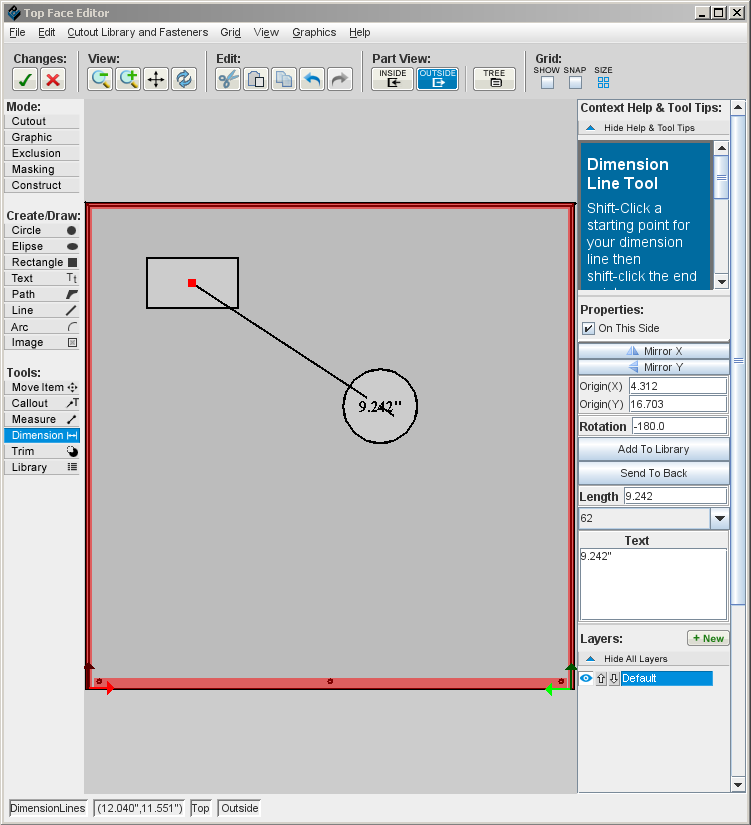
- The lines turn red when the measurement does not have any meaning. There are only three types of measurements that have meaning:
- The distance between the two points;
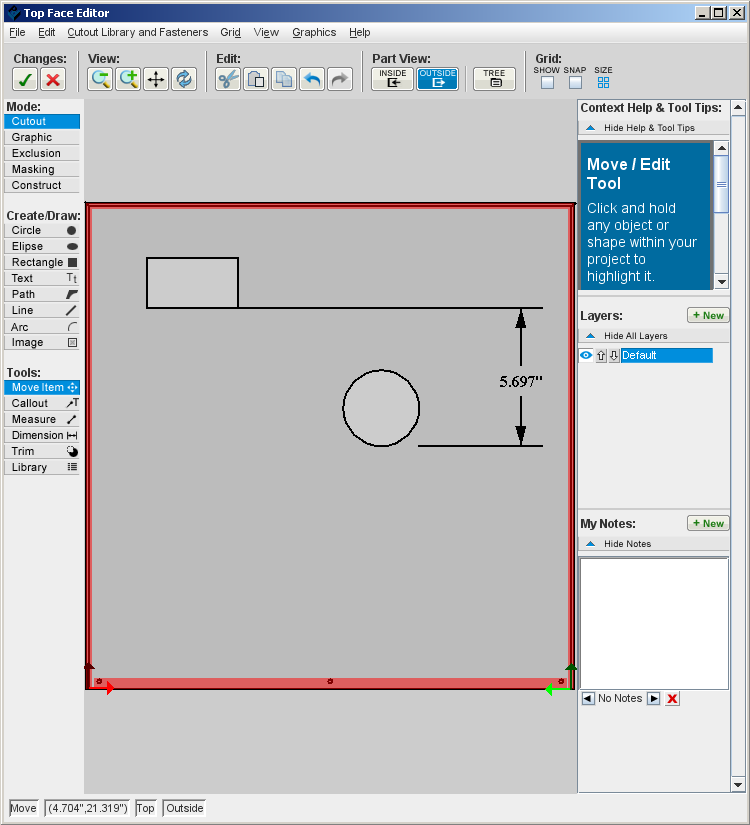
- The distance in the x axis (when the lines are vertical and the arrows are horizontal); and
- The distance in the y axis (when the lines are horizontal and the arrows are vertical).
- Click the second endpoint of the distance you wish to measure.
- When the lines and distance are the way you want them, click the mouse.
- The displayed lines and measurements are saved to the face, and the measurement is reset to 0.000 at the cursor position. You can add more measurements to the screen in this way.
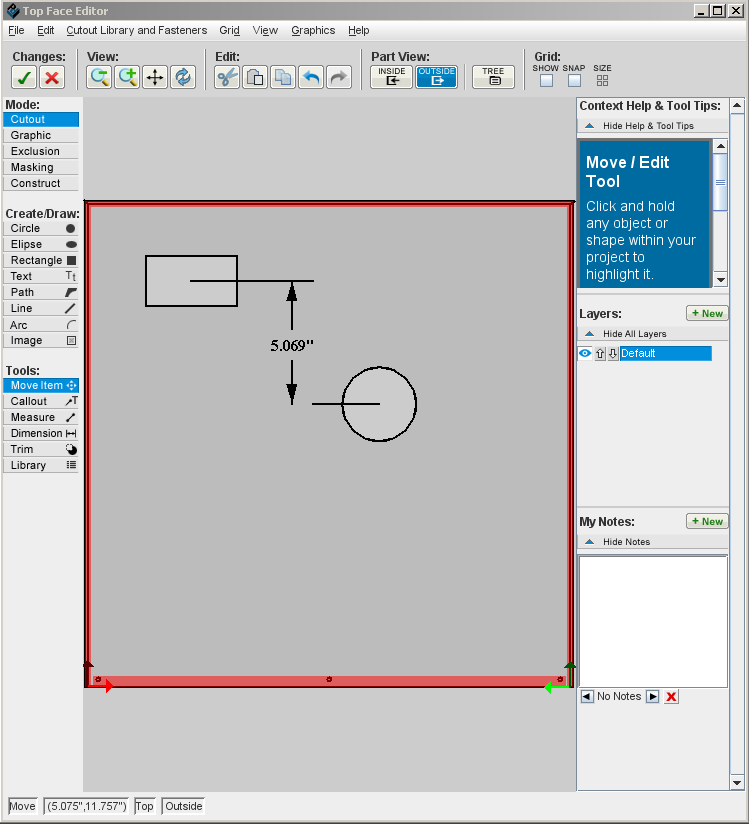
- Tip: You can display the measurement with the lines at an angle to their endpoints. For example, here the distance is shown between the bottom of the rectangle and the bottom of the circle:
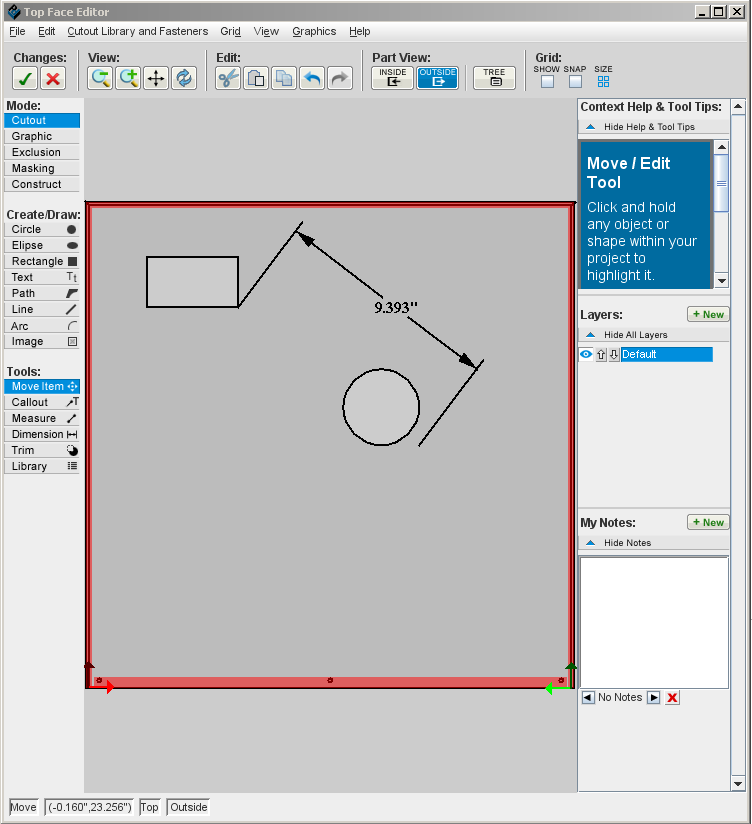
- and here the user drags the cursor to a position at an angle:
To delete a displayed measurement
Do either of the following:
- Right-click one of the lines in the measurement and choose Delete from the floating menu.
- Highlight the line and press the <Delete> key.
See Also
Using the grid
Use the grid to quickly place and align objects.
Note that for precise positioning of an object, especially when placing objects relative to other objects, you can also use the Measure tool or the alignment and distribution buttons in the Properties panel.
Turn on/off the Grid
- Do one of the following:
- Repeat to toggle the state of the grid.
Turning on/off Snap to Grid
- Do one of the following:
- Repeat to toggle the state of Snap to Grid.
Changing grid size and offset
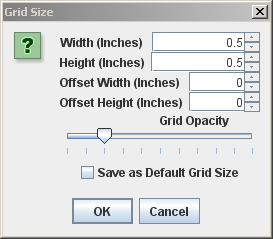
- On the Standard toolbar, click
 or choose Grid Size from the Grid menu.
 - In the Grid Size dialog that opens, change any of the following values:
- Width: Horizontal distance between grid lines.
- Height: Vertical distance between grid lines.
- Offset Width: Horizontal offset of grid lines from default grid position.
- Offset Height: Vertical offset of grid lines from default grid position.
- Grid Opacity: Opacity of the grid lines. Move the slider to left for lighter lines or the right for darker lines.
- Save as Default Grid Size: Use the current grid size when editing all faces in the Face Editor Window.
- Note: If you change the Grid Size and do not check Save as Default Grid Size, the grid will revert back to the default size after closing the Face Editor, even if you re-open the same face.
Managing object properties
Top of Properties Panel
- Click the line that reads "Click to Expand Context Help" to read usage tips for the current object you are editing (circle, ellipse, text, etcetera). Click anywhere in the upper panel again to hide the help.
- For help on the Layers buttons and its toolbar, please see Adding and managing layers.
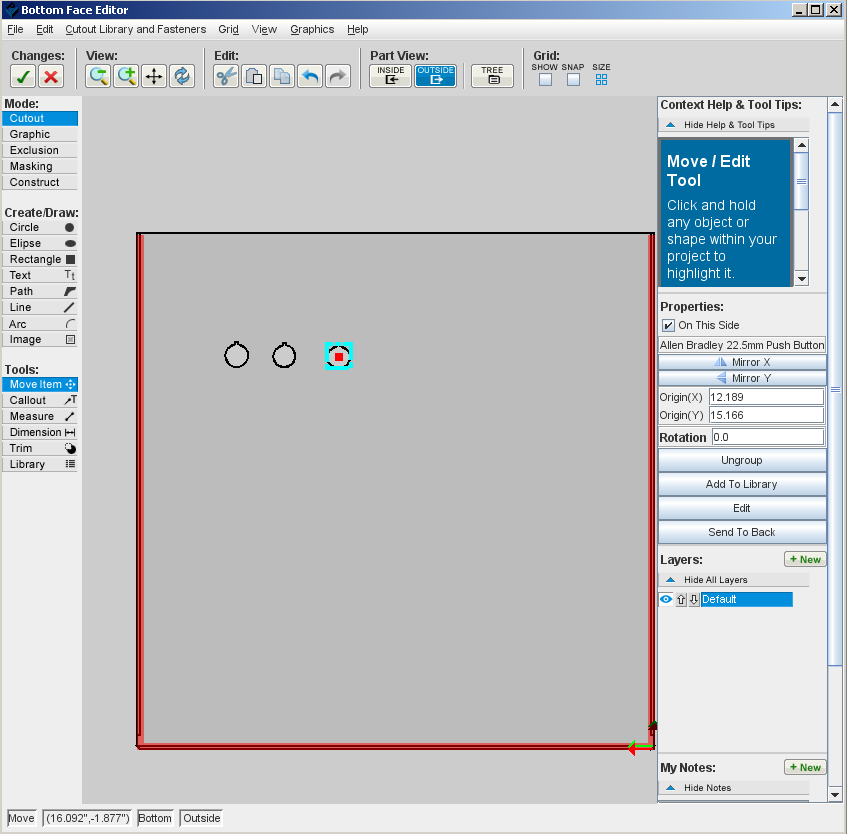
- The checkbox "On This Side" is selected when the object is on the side that you are editing. Clear the check box to move the object to the other side of the face.
- Tip: You can right-click any object and choose Properties to open the Properties dialog, where you can change various properties depending on the object.
Fill
- Select the check box to fill in the object. The line thickness option is not available when the check box is selected.
Line Thickness
- Select a value from the list below the Filled check box.
Color
- Select a color by clicking the current color shown in the Properties panel, which opens the color menu.
Type
- Change the object type by selecting a different type from the list.
- Object types include:
- Cutout
- Graphic (Silkscreen or Digital Print)
- Exclusion
- Construct
Origin
- Change the location of the X and Y origins of an object with respect to the absolute coordinate system.
- Enter a number and press the Tab key to accept.
- The origin of an object is indicated by a red square.
- The origin for each object is determined as follows:
- Circles -- centre
- Ellipses -- centre
- Rectangles -- corner closes to the absolute origin
- Text -- bottom left corner
- Paths -- start point
- Lines -- start point
- Images -- bottom left corner
See Also
Circles
- Radius, Diameter -- Changing one of these properties will automatically update the other. Diameter is twice the radius.
Ellipses
- RadiusX -- Radius along X-axis (defines horizontal length).
- RadiusY -- Radius along Y-axis (defines vertical length).
Rectangles
- Width, Height -- Width and Height of the object.
- Rotation -- Angle with respect to origin in degrees. Positive value rotates object clockwise and negative value rotates object counter-clockwise
Lines
- Length -- Distance from origin to end point.
Images
- Width, Height -- Width and height of the object.
- Rotation -- Angle with respect to origin in degrees. Positive value rotates object clockwise and negative value rotates object counter-clockwise
Text
- Rotation -- Angle with respect to origin in degrees. Positive value rotates object clockwise and negative value rotates object counter-clockwise
- Font -- Change the font to Arial, Courier, Garamond, Avant Garde, Times New Roman, Palatino, Bookman, Handwriting, Lucida Sans, Garamond, Verdana, Viking Stencil, Times New Roman, USAAF Stencil, Marketing Script-Shadow, Marketing Script, or Octin Stencil. Unicode characters (language scripts, punctuation marks, diacritics, mathematical and technical symbols, etc.) are also supported; see Adding special characters.
- Font Size -- Change the font size within the available range of 9-99 points. Note: Available font sizes are based on quality for the given materials. For example, Times Roman requires a minimum font size of 11 points. Also, colored letters on signal white powdercoat base are legible to 6 pt font for both Serif and Sans Serif fonts. For colored letters on non-white powdercoat, minimum font size is 10 pt for Serif fonts and 8 pt for Sans Serif fonts.
- Font Style -- Change the font style to Regular, Bold, Bold Italic, or Italic.
- Text -- Change the text to appear on the face. Press the Tab key to accept.
Path
- Rotation -- Angle with respect to origin in degrees. Positive value rotates object clockwise and negative value rotates object counter-clockwise
Adding notes
You can add Notes to objects to communicate your design intentions to our Engineering & Design Services team. For example:
- "Round the corners of this rectangle to a radius of .05 inches."
- "Put a hinged door over this cutout."
- "Put rubber feet on this face.”
To add a note about a non-stocked item such as permanent marking or piano hinges, you can draw the area for it in the proper location, using the Construct mode, and attach a note asking our Engineering & Design Services team to add it for you. Any object can have multiple notes. You can also add general notes (not attached to any specific object) to a face or part. Note: If your notes result in significant design changes (such as a request for a non-stocked item), the quote that Designer generates might not be accurate. After you submit the file, Protocase Engineering & Design Services will give you the correct quote.
To add a note to an object
- In the Face Editor, select the object that needs a note.
- Type the note in the blank text window in the Properties panel. When done, click either arrow above the text box, or any other tool in the Properties panel.
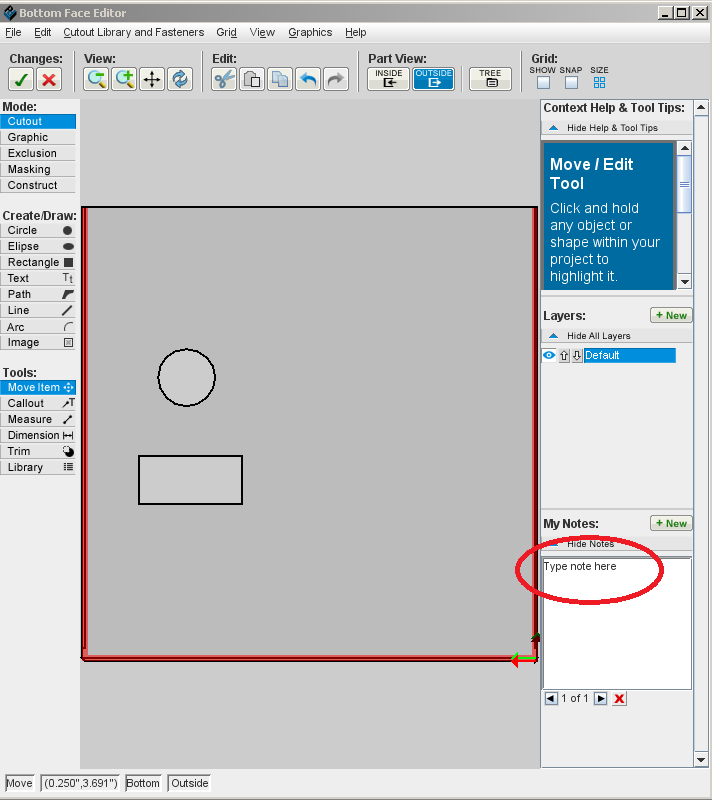
- If the object already has a note, it will be displayed in the text window; to add another note to the object, click the New button, which clears the text window so you can enter another note.
- Every note you enter is saved with the object. If the object has multiple notes, use the forward and back arrows to view them. You can edit each note at any time.
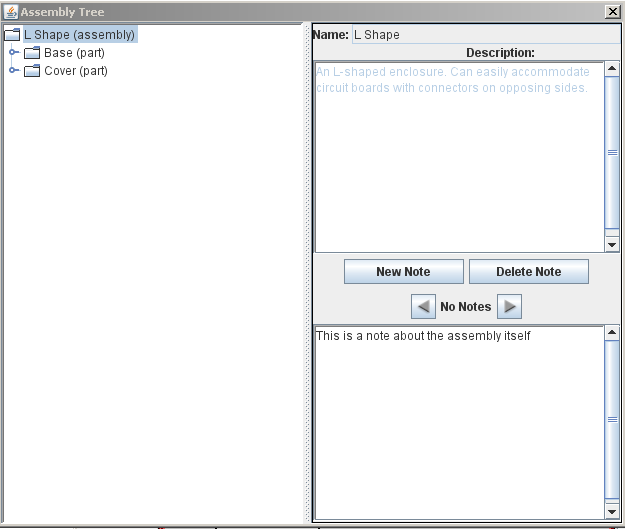
To add a general note
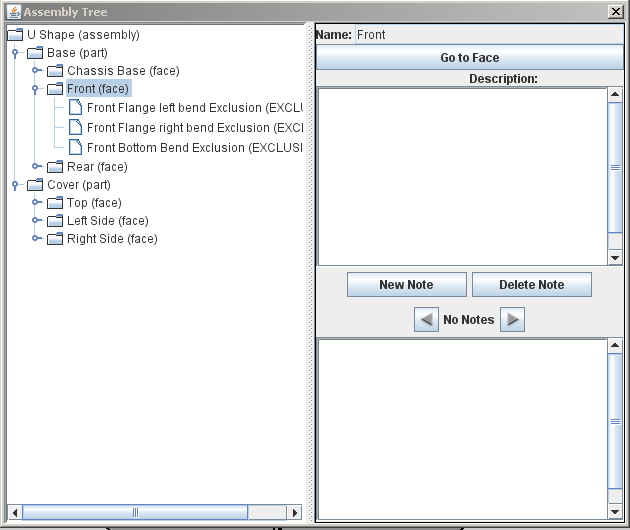
- In the Face Editor or 3D View toolbar, click the Part Tree 40px button.
- In the tree list view, click the part of the enclosure that makes most sense to add the note.
- Type the note in the bottom text window. In the following example, a note was added to the assembly.
The note is saved when you close the window or move to another part of it.
To delete a note
- Display the note, then click the Delete button.
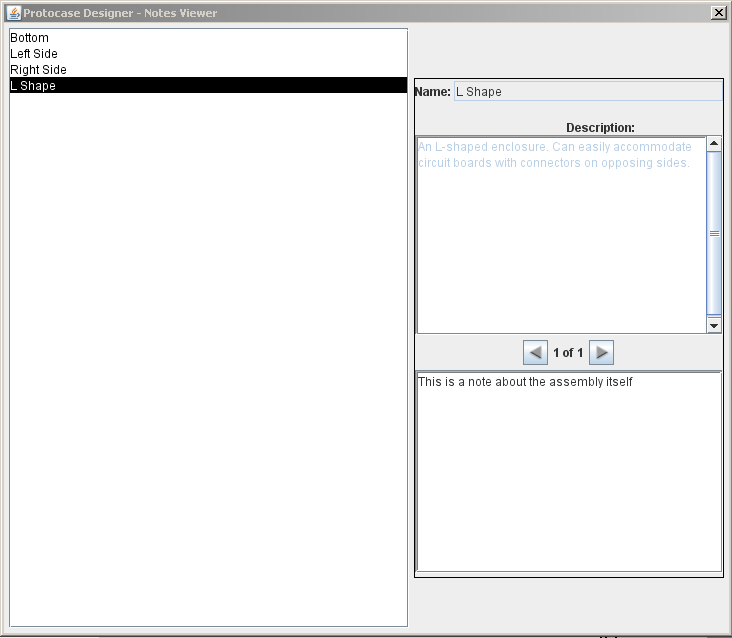
To review all notes for a design
- In the 3D Editor, select View > View Notes. The Notes Viewer window opens, where you can see all notes for all faces at a glance.
- To go to the object and its notes in the Face Editor, highlight any note for the object, then click the Go to Face button. The Face Editor will open, with the object selected.
Adding cutouts
You can add built-in and custom cutouts to your enclosure.
See Also:
Adding a cutout by browsing the Cutout Library
Use this method to get a summary description and image of each item in the library.
- In the Face Editor, choose Cutout Library and Fasteners > Cutout Library.
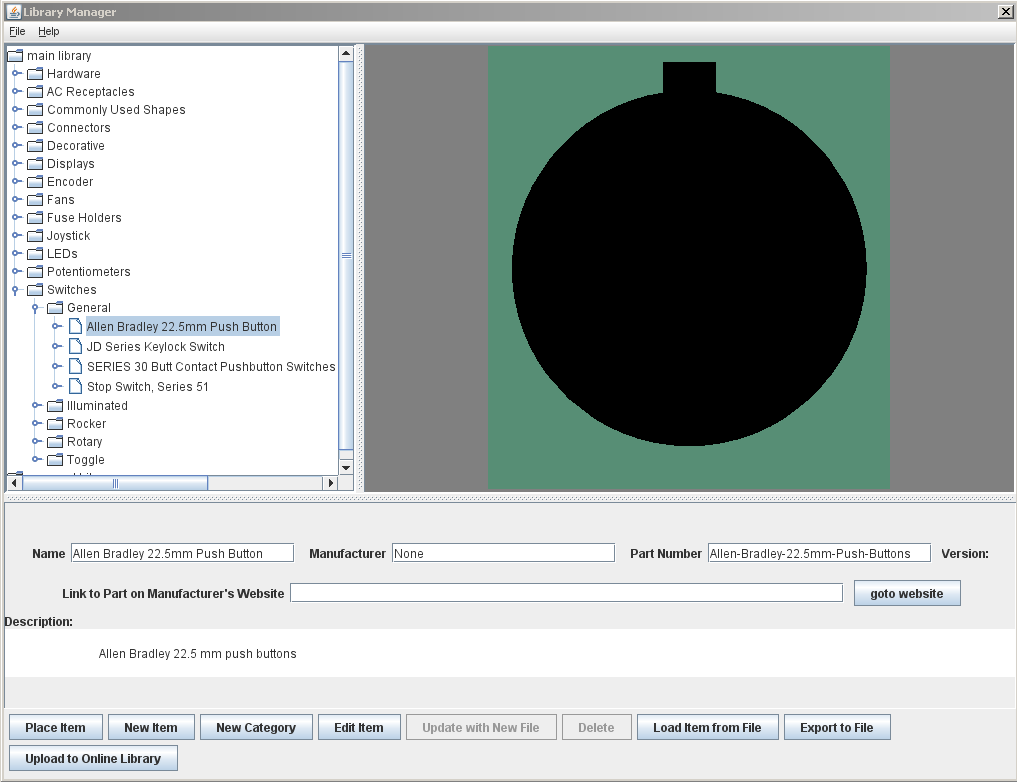
- Browse through the listings, clicking any one you are interested in to display it and its description.
- Click the Place Item button to load the displayed cutout. You are returned to the Face Editor, and the cursor changes to an image of the cutout.
- Click on the face in each location where you want to place the cutout.
- When you are done, press <Esc> or click any Mode tool to exit the placement process.
Use this method when you know exactly which cutout you want to load.
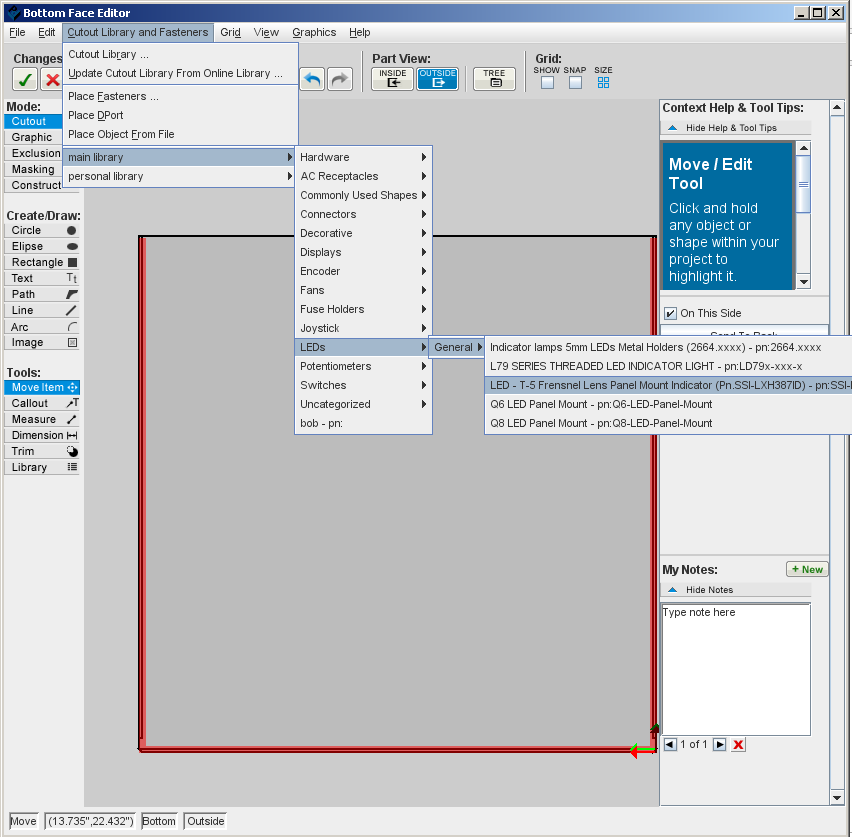
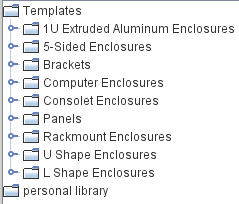
- In the Face Editor, drill down through the Cutout Library and Fasteners > main library or personal library listings, and click on the name of the cutout that you want to load.
- The cursor changes to an image of the cutout; click each location on the face where you want to place the cutout.
- When you are done, press <Esc> or click any Mode tool to exit the placement process.
Adding "D" port cutouts
You can add a "D"-shaped cutout (a circle with one side flattened) to your enclosure design.
- In the Face Editor, choose Place DPort from the Cutout Library and Fasteners menu and click the face to place it. The D-cutout is added in a default size, which you can change using the fields in the Properties panel.
- To place multiple cutouts, copy and paste it.
See Also: Creating Double-D cutouts
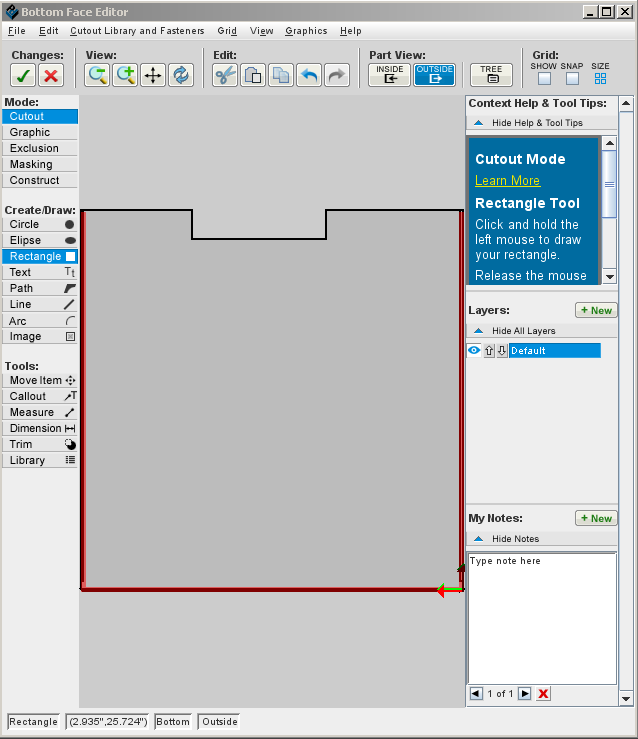
Adding cutouts that cross the edge of a face
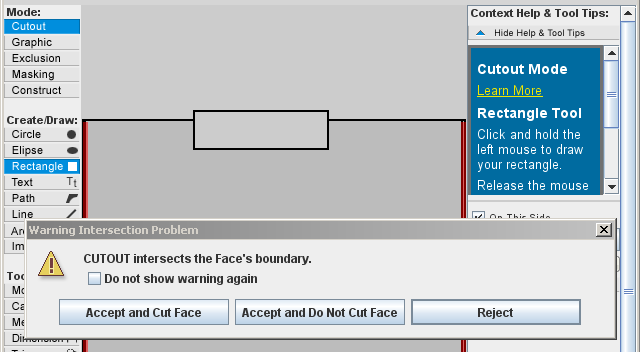
You can configure Designer to allow you to choose to cut the edge of the face when placing an object across a face boundary. This is also known as making notches. Click here to read a blog post about the usefulness of notches: http://www.protocase.com/blog/2017/05/02/what-to-do-when-cutouts-and-other-components-need-to-be-placed-close-to-a-bend/
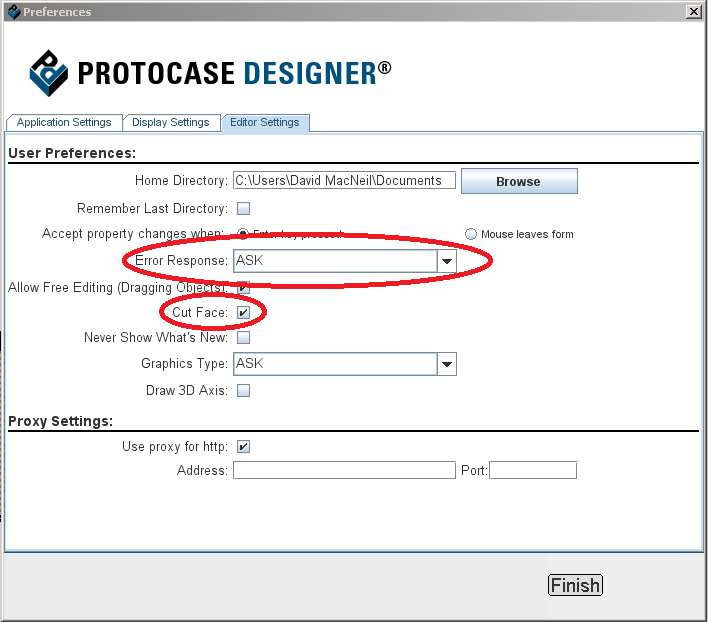
- In Preferences, set Error Response to ASK. This will cause Designer to prompt you to choose whether to accept or reject the placement when you draw or move a cutout so that it lies across the boundary.
- Also in Preferences, clear the Cut Face check box. (If you select the check box, Designer will not give you a choice, but will automatically cut the boundary.)
- Click OK to save the Preferences settings.
Adding hardware
You can easily add hardware on your enclosure to accommodate various components, such as self-clinching fasteners and handles.
Adding self-clinching fasteners
Protocase uses PEM® brand self-clinching fasteners.
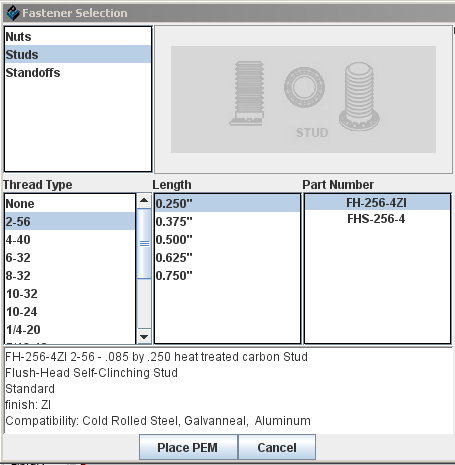
- In the Face Editor, choose Cutout Library and Fasteners > Place Self Clinching Fasteners.
- Select the type (Nuts, Standoffs, or Studs) and then select the Thread Type.
- If you are adding standoffs or studs, the available thread Lengths are displayed. (Nuts do not have thread lengths, so if you are adding a nut, skip the next step.)
- Select the thread Length.
- The available Part Numbers are displayed.
- Select a Part Number.
- Note: Parts displayed with strikeout through the name are incompatible with the enclosure's current material type and/or thickness, and cannot be selected. If you continue with the incompatible design, you will receive a design check error when you estimate, order, or use the design check feature.
- Because fasteners have a minimum metal thickness, larger fasteners are not listed if the current enclosure material is too thin for them, or if the material is stainless steel and the fastener is zinc-coated. (Zinc-coated fastener names end with "ZI".) Some materials, especially stainless steel, require special fasteners. These cost a little more than standard ones.
- Note: Parts displayed with strikeout through the name are incompatible with the enclosure's current material type and/or thickness, and cannot be selected. If you continue with the incompatible design, you will receive a design check error when you estimate, order, or use the design check feature.
- Click the Place PEM button, and then click on the face wherever you want to add the fastener(s). Note that if you try to place fasteners that are incompatible with the enclosure material, you receive a warning, as you did when you selected the incompatible Part Number.
- When you are done adding fasteners, click the Edit button
 or press the Esc key.
See Also:
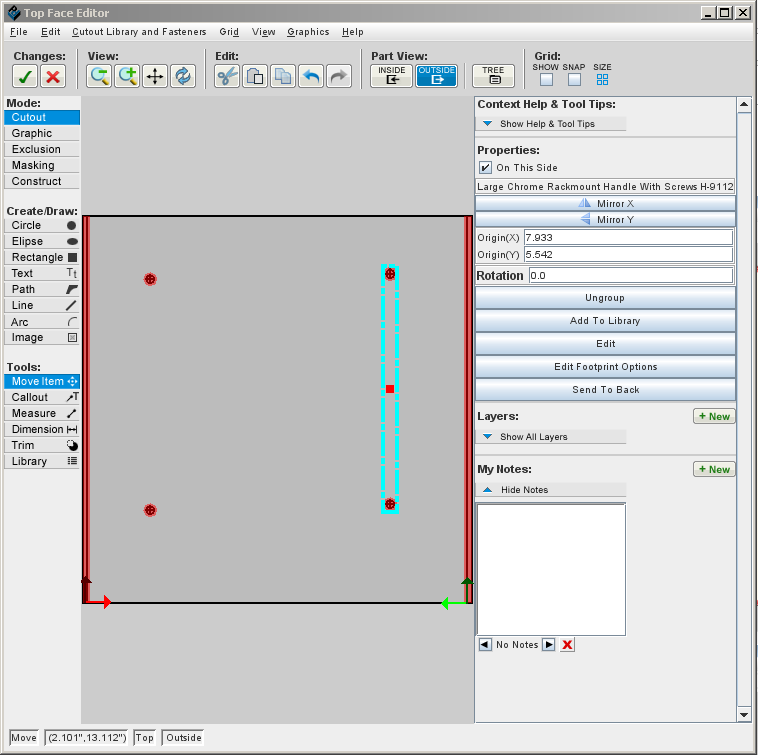
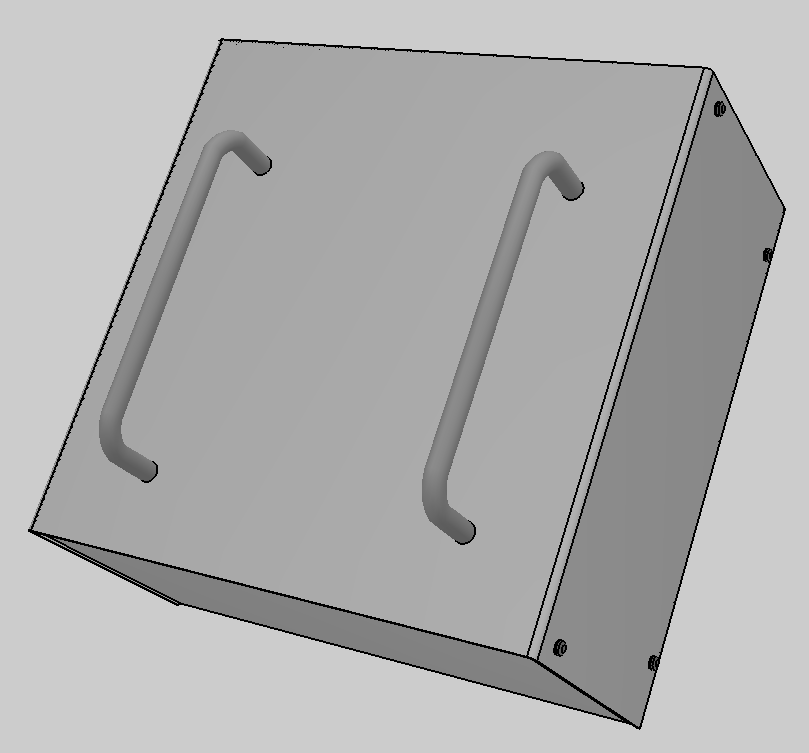
Adding hardware such as handles
- On the Standard toolbar, click Grid
 to show the grid.
 - On the Cutout Library and Fasteners menu, click Cutout Library, point to Hardware, then select a hardware item.
- When you are done adding hardware, click the Edit tool
 .
.
Adding countersinks, tapped holes, and screws
Adding a countersink to a face
- In the Face Editor, choose the face you want, and draw a circle for the countersink hole.
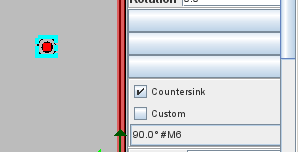
- Select the new Countersink check box in the Properties panel.
- Click OK to select the default, or click the down-arrow to select a different size and then click OK.
- Note: Thread Size includes the angle of the countersink on the head, and the standard thread size. For example, a thread size of "100.0° #2" indicates a countersink angle of 100 degrees, with the standard #2 thread size.)
- If you chose a countersink size that is not the same size as the hole, a warning message is displayed and you are given the option to correct it. Click Yes to have the hole size changed to match the selected countersink size. Click No if you want a different tolerance than is specified for the screw.

- The countersink is drawn on the face.
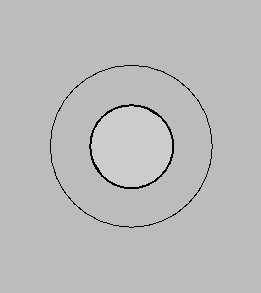
- Note that in the Face Editor, the countersink is indicated with a solid circle with a circle around it. The outside circle indicates the outside diameter of the head of the screw, so you should keep it clear from any intercepting cutouts, other fasteners, etcetera.
Adding a tapped hole to a face
Important! Tapping holes in thin sheet metal is not recommended, since it is too thin for threads. Please consider using a self-clinching nut instead.
- In the Face Editor, choose the face you want, and draw a circle for the tapped hole.
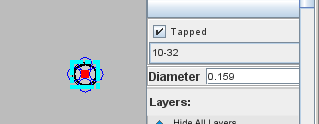
- Select the new Tapped check box.
- Click OK to select the default, or click the down-arrow to select a different size and then click OK.
- Note: Thread Size includes the hole diameter along with the standard screw types. For example, a thread size of "2-56 [0.07]" indicates the standard 2-56 screw type with a diameter of 0.07" for the threaded hole. The minor diameter is used along with some tolerance so that it does not bind.
- If you chose a thread size that is not the same size as the circle, a warning message is displayed and you are given the option to correct it. Click Yes to have the circle changed to match the selected thread size. Click No if you want a different tolerance than is specified for the screw. (Important! In versions 4.4.9-Jul07 and higher, you are no longer given the option to change the hole size. It must be the same size as the circle.)
- The tapped hole is drawn on the face.
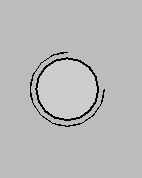
- Note that in the Face Editor, the tapped hole is indicated with a solid circle with a partial circle around it. The outside circle indicates the outside diameter of the head of the screw, so you should keep it clear from any intercepting cutouts, other fasteners, etcetera.
- The tapped hole is drawn on the face.
Adding screws to a face
- Screws are included in each template (along with its hole cutout), and do not have to be added manually. However, when you load a new template, you can select the screw type and color.
- A Flathead screw will be countersunk by default. Even if you choose an enclosure with a different default screw and change it to Flathead, it will use a countersunk screw.
- You cannot replace a screw with another screw; you can only replace it with a self-clinching fastener.
Replacing screws and PEMs
You can review information on screws, and replace a screw with a PEM (or replace a PEM with another PEM), as follows. (Note that you cannot replace a screw with another screw.)
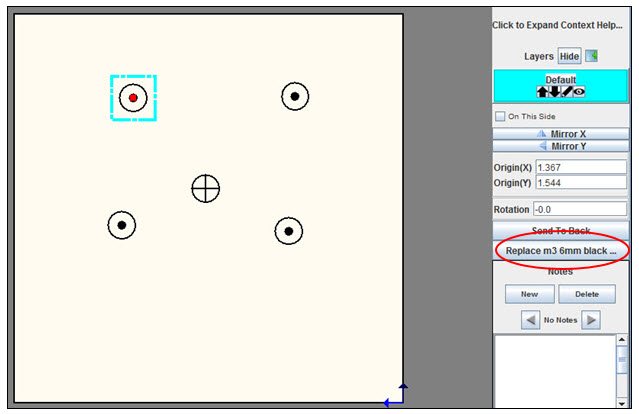
- In the Face Editor, click Edit, then select the screw. Note: If the screw is grouped, you must first ungroup it.
- In the Properties panel, notice the new Replace... button, which includes the part name of the screw. (Only part of the part name is visible on the button; to read the entire name, hover over the button.)
- To replace the screw with a PEM (or a PEM with another PEM), click the button. The Self Clinching Fastener Selection dialog opens, where you select the Thread Type and Part Number, and then click the Place PEM button.
Alternate method: Right-click a screw and choose Properties to review and/or replace the screw with a PEM. The Properties window also lets you edit the Origin(X), Origin(Y), Rotation, and the side of the face that the screw sticks up out of.
Creating and adding a bracket or other subassembly
You can create customized subassemblies and save them to the Cutout and Fasteners Library. You can then add them to enclosures at any point. In the following procedure, you create a bracket and save it as a subassembly, then add it to an enclosure.
To create and save a subassembly
- Click New.
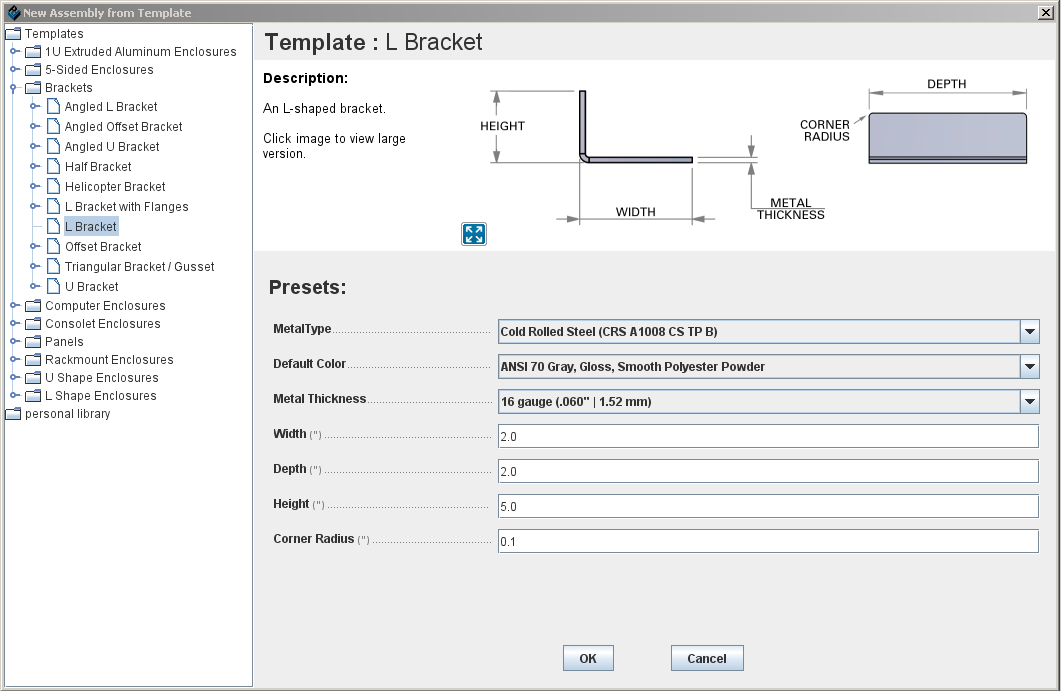
- Choose the bracket that you want to customize, and then edit its parameters (Width, Depth, Height, etc.) as necessary.
- Add elements (cutouts for mounting, standoffs, etc.) as necessary to each face. When done, click the Accept Changes button.
- The 3D View window opens.
- Choose Create Subassembly from the Cutout Library Manager menu.
- You are prompted to select the face that is the mating face (that mounts onto the enclosure); click OK and then do so.
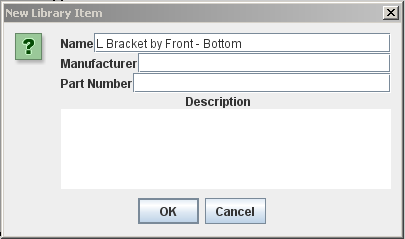
- You can enter or edit the following information for the bracket:
- Name: Note that a default name is provided that identifies the type of assembly, the mating face, and whether the mating face is on the top or bottom of the subassembly. For example, if you save an L bracket as a subassembly and select the outside of its base as the mating face, the default name in the New Library Item dialog is "L Bracket by Base - Bottom". We recommend that you change this default, to ensure that the subassembly name remains unique.
- Part Number
- Description
- Click OK.
- You receive a message that the bracket has been added to your library. It is now listed in the Cutout Library and Fasteners menu.
- Note on subassembly origin and placement: The default origin for placement is the default origin of the subassembly template. In the 3D View, the origin is displayed with a red dot and arrows. In the Face Editor, the origin is displayed with blue arrows, and the x and y values in the Properties panel refer to this origin point. When placing a subassembly on an enclosure, the origin will be placed precisely where you click the enclosure face.
- You receive a message that the bracket has been added to your library. It is now listed in the Cutout Library and Fasteners menu.
To place a subassembly on an enclosure
- Load the enclosure and select the face to which you will add the bracket.
- Note: If you have just saved a subassembly to the library, it remains displayed, and when you click New to load an enclosure, you are prompted to save the current project. If you plan on making further changes to the subassembly later, do save it as a project, since currently you cannot use the editing tool in the Cutout Library to edit it. (This will be fixed in a future release.)
- In the Face Editor, make sure the correct Inside or Outside of the face is selected for the subassembly placement.
- From the Cutout Library and Fasteners menu, choose Cutout Library. The Library Manager window opens; select the subassembly that you want to add to the enclosure.
- Click the Place Item button.
- The footprint (outline) of the mating face of the bracket is displayed as the cursor icon.
- Move the cursor (the footprint moves with it) to the desired location and click to drop it there; as noted above, the origin point of the assembly will be placed where you click. You can add multiple subassemblies in this way.
Manipulating objects
Selecting object(s)
- On the Drawing toolbar, select the Edit tool.

- Do one of the following:
- To select a filled object, click anywhere on the object.
- To select an unfilled object, click the border of the object.
- To select multiple objects:
- Click the first object, then down the <Shift> key and click the other objects; or
- Click and drag a selection box over all the objects.
Editing object(s)
To edit a single object
- Click the Edit button on the Mode toolbar, select the object, then edit any of the fields in the Properties panel.
or
- Right-click the object and choose an editing command (Delete, Rotate, Properties, Send Behind, or Merge) from the floating menu. If you choose Properties, the Properties dialog opens, where you can edit additional properties specific to that object type.
To edit a group
You can edit the group as a whole, or you can edit each individual object in the group. To edit the group as a whole, follow the instructions above for a single object. To edit individual objects in a group:
- Click the Edit button in the Properties panel.
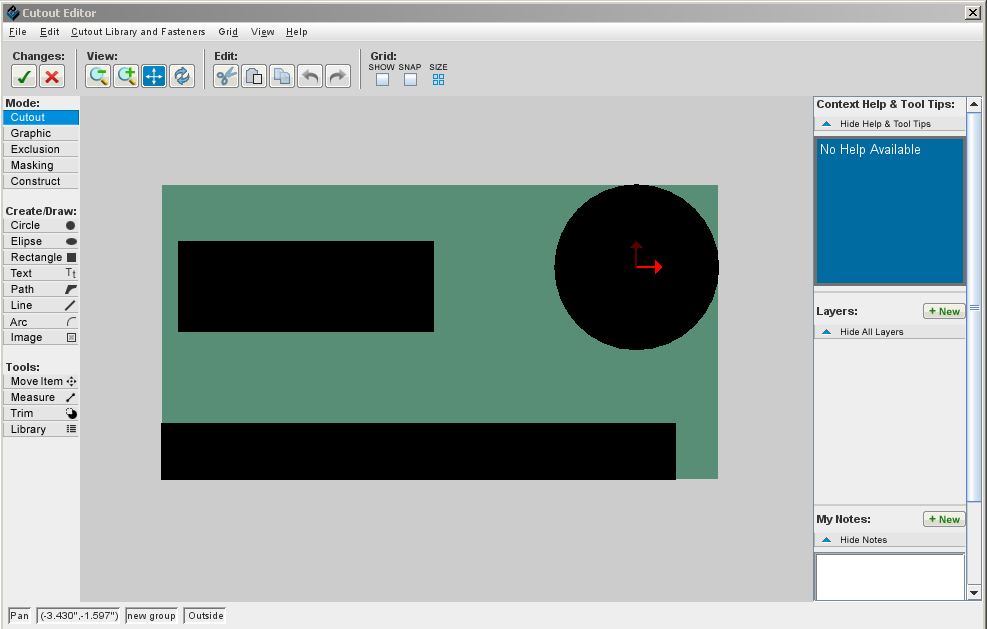
- The group of objects is displayed in the Cutout Editor. This screen is like the Face Editor, but only the group of objects is displayed. You can now edit any of the individual objects in the group.
- When you are finished editing the objects in the group, click Accept and Close
 in the Face Editor toolbar. The Cutout Editor closes, and the group is displayed as usual in the Face Editor.
See Also
- To ungroup the items, edit them individually, then regroup the items without leaving the Face Editor, see Grouping and ungrouping objects.
Moving object(s)
To move a single object:
- Select the object.
- Click anywhere on the object and drag to the desired location.
To move several objects:
- Select all the objects.
- Press and hold the Shift key, then click any of the objects and drag to the desired location.
To move cutouts from one face to another:
- On each face that you want to switch, group the items, add the group as a single cutout to your cutout library, then delete the items.
- Add each grouped cutout from the Cutout Library to the desired face, then use the Measure tool to adjust the placement. Once the placement is correct, you can ungroup the items so they are easier to work with.
- For detailed instructions, see:
Locking item(s)
To lock a single object:
- Select the object.
- Check the "Is locked" button under the properties menu to lock the item.
To Lock several objects:
- Hold the shift button, and select all the objects you wish to lock.
- Check the "Is locked" button under the properties menu to lock the items.
Grouping and ungrouping objects
To group objects
- Click the Edit button on the Mode toolbar.
- Click and drag the mouse to draw a box around the objects you want to group, or hold down the <Shift> key and select each object.
- Click the Group button in the Properties panel.
To ungroup objects
- Click the Edit button on the Mode toolbar.
- Click the group.
- Click the ungroup button in the Properties panel.
Note When grouped, the origin for the group is the origin of the first object created in the group. If you are saving a group as a cutout in the Cutout Library, then after saving it, you might want to change the origin to make it more useful for later placement.
See Also
- Grouping objects to switch faces for cutouts
- Saving a group of objects as a single cutout to the Cutout Library
Aligning and distributing objects
You can arrange objects on a face using the Alignment and Distribute commands.
- Select 2 or more objects.
- In the Properties panel, click an Alignment or Distribute command.
Alignment
![]() Align Origins of Objects Vertically
Align Origins of Objects Vertically
![]() Align Tops of Objects
Align Tops of Objects
![]() Align Centers of Objects Vertically
Align Centers of Objects Vertically
![]() Align Bottoms of Objects
Align Bottoms of Objects
![]() Align Origins of Objects Horizontally
Align Origins of Objects Horizontally
![]() Align Left Sides of Objects
Align Left Sides of Objects
![]() Align Centers of Objects Horizontally
Align Centers of Objects Horizontally
![]() Align Right Sides of Objects
Align Right Sides of Objects
Notes:
- Objects align to the first object selected.
- When using the selection marquee, objects align to the last object created.
Distribute
![]() Distribute Origins Vertically
Distribute Origins Vertically
![]() Distribute Space Vertically
Distribute Space Vertically
![]() Distribute Distance Between Tops
Distribute Distance Between Tops
![]() Distribute Centers Vertically
Distribute Centers Vertically
![]() Distribute Bottoms of Objects
Distribute Bottoms of Objects
![]() Distribute Origins Horizontally
Distribute Origins Horizontally
![]() Distribute Space Horizontally
Distribute Space Horizontally
![]() Distribute Left Sides of Objects
Distribute Left Sides of Objects
![]() Distribute Centers Horizontally
Distribute Centers Horizontally
![]() Distribute Right Side of Objects
Distribute Right Side of Objects
Cutting, copying, and pasting objects
- Click the Edit tool and select one or more objects.
- To cut the object(s), click the Cut button
 or choose Edit > Cut. To copy the object(s), click the Copy button
  or choose Edit > Copy.
 - After copying or cutting, click the Paste button
 or choose Edit > Paste.
- A copy of the object(s) is displayed under the cursor.
- Click the face to place the copied or cut object(s) at that location.
- Continue placing object(s) on the face and click the Edit tool
 or press the <Esc> key when you are done.
Undoing and Redoing actions
Click the Undo ![]() or Redo
or Redo ![]() button in the Face Editor toolbar, or choose Undo or Redo from the Edit menu.
button in the Face Editor toolbar, or choose Undo or Redo from the Edit menu.
Adding and managing layers
When working with complex designs, layering lets you group similar elements and hide all other elements in the editor. It can also affect the end product, depending on what is being layered. The default layer is always present and is always used first.
Layer Toolbar
Each layer has its own toolbar, with the following buttons:
 Move the layer up in the list.
  Move the layer down in the list. Note: The two Move buttons position the layers in the order that they will be produced, and in the order that they are drawn on the screen. The one exception to this is that cutouts are always displayed on top.
 Edit the layer.
 Show/hide the layer. (This is a toggle button.)
  Delete the layer.
To add a new layer
- In the Face Editor, click the (unlabeled) New Layer button at the top of the Properties panel.
- Enter a name for the layer (examples you might use: Output, Input, Buttons, Graphics, Power, Lights).
- The layer is added to the Properties panel with its toolbar, and is automatically selected as the current layer.
To copy and paste between layers
- Cut or copy the object(s) from one layer.
- Select the layer where you want the object(s) to be placed.
- Paste the object(s).
Important! When working with layers, be sure to check which layer you are working on before making any edits. The current layer is highlighted in the list.
Using the Array Tool
The Array tool allows you to link a group of objects together that are placed on the face of the enclosure or part, such as PEMs, cutouts or images. Using this tool, you can position the objects relative to each other, or move them as a group, which is useful for keeping alignment and maintaining even spacing between objects.
To create an array:
- Click the "Edit Face" button on the Edit tool bar, and then select the face you wish to work from.
- Create and/or select the object you wish to use.
- With the object highlighted, select the "Array" tool in the left tool bar.
- Choose your preferred array type (Linear, Circle, or Rectangle.)
You will then be prompted to set the parameters to different dimensions. Each array type has different parameters:
A linear array will create a line of objects. Its parameters are:
- Angle (the angle from the x-axis to create the array)
- Spacing (the distance between objects in the array)
- Quantity (the number of objects in the array
A circular array takes your initial object, and repeats it in a circle around the original object. Its parameters are:
- Total Radius (the radius of the outermost row)
- Number of rings (the number of rows of objects)
- Quantity in 1st ring (the number of objects in the first circle)
A rectangular array takes your initial object, and repeats it in a rectangle around the original object. Its parameters are:
- X Spacing (horizontal spacing)
- Y Spacing (vertical spacing)
- X Quantity (number of columns)
- Y Quantity (number of rows)
Note: Arrays can be ungrouped by selecting the "ungroup" button in the properties panel. However, make sure that the snap function is turned off in order to ensure that your objects are properly spaced.
Printing one or more faces on paper for review
To print one face, or all faces, of the enclosure
- To print a single face, display the face in the Face Editor and choose Print To Scale from the File menu. To print all faces of the enclosure, choose the same command in the 3D View window.
- In the dialog that opens, select the printer.
- When verifying a design, set the Absolute Scale to 100%, then tape together the multiple sheets that are printed. To make a small-scale model, set it to 50% or whatever scale you want.
- Click Print.
To calibrate the printer
Many printing devices do not print the correct size even when you specify 100%. Before you print a face, be sure to calibrate your printer.
- In the Print to Scale dialog, select the printer, then click the Calibrate Printer button.
- A test page opens.
- Click Print to print the test page. Then use a ruler or caliper to measure the width and height of the printed rectangle.
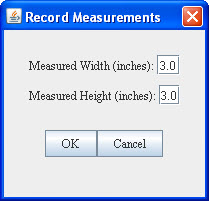
- The Record Measurements dialog opens.
- If the printed rectangle is not 3" x 3", then enter the Measured Width (in inches) and the Measured Height (in inches) and click OK.
Exporting and importing face templates
You can export a face to a .PNG file for editing in a third-party graphics editor, and you can import the edited .PNG back into the Face Editor. This feature is useful when reviewing designs, using them in slideshows or other presentations, or making complex graphical edits to a face where a global image of the face with its cutouts are necessary for proper alignment of the graphics. In this latter case, as described in the steps below, you export the face with all its cutouts and other elements to a .PNG file, add the graphics to that .PNG using your third-party graphics editor, and then import the revised .PNG back into Designer.
If you only have a single image that you want to import, you may want to instead import it using the Image tool instead, which does not involve exporting the cutouts. For details, see Adding images.
- Make sure that the face you want to export is displayed in the Face Editor.
- Select Graphics > Export Graphics template. The Save dialog opens.
- Enter a name for the .PNG file and click Save. A properly scaled .PNG of the face is created, complete with all cutouts and other elements.
- Open the exported file with your graphics editor and add the images/text to be silkscreened or digitally printed, aligning them appropriately with the cutouts, which are displayed in pink (hexadecimal value FF9999). (Note that this is the one color you cannot use for your graphics ink in Designer, because Protocase Designer will always recognize this color as a cutout and never as a graphic.) Ensure that you do not add any image or text over the cutouts. Additionally, if the face contained any text or images when you exported it, they will be retained when you import the file back into Designer, and will overlay the original graphics. You can remove these from the exported file before you import it back into the face, or else remove the duplications after you import it.
- When done editing, save the file again in .PNG format.
- To import the revised face back into your enclosure design, first ensure that the face is displayed in the Face Editor, then select Graphics > Import graphics template and choose the .PNG file you just saved. The imported file overlays the entire face, and you can move or delete it just like a normally imported image.
- If you need to make additional graphical changes that cannot be done with Designer and you have not made changes to the cutouts or other elements of the face, simply edit the .PNG file again in your graphics editor, and re-import it to the Face Editor. You do not need to remove it from the face first; it will be automatically replaced by the most recently imported file, as long as it has the same name.
- See Also: To import a graphics file to be silkscreened or digitally printed on a face, see Adding images.
